搜索到
6
篇与
的结果
-
 gin简介 一、gin简介 1.1 什么是ginGin 是一个用Go 语言编写的高性能 HTTP Web 框架。它提供类似 Martini 的 API,但性能显著提升——速度最高可达 Martini 的 40 倍——这得益于httprouter 的引入。Gin 专为构建对速度和开发者效率要求极高的 REST API、Web 应用程序和微服务而设计。1.2 为什么选择ginGin 结合了 Express.js 式路由的简洁性和 Go 的高性能特性,使其成为以下场景的理想选择: - 构建高吞吐量 REST API - 开发需要处理大量并发请求的微服务 - 创建需要快速响应时间的 Web 应用程序 - 使用最少的样板代码快速构建 Web 服务原型1.3 gin的主要特点- 零内存分配路由器- 无需堆内存分配,实现极其高效的内存路由 - 高性能——基准测试表明,与其他 Go Web 框架相比,速度更快。 - 中间件支持- 可扩展的中间件系统,用于身份验证、日志记录、CORS 等。 - 无崩溃风险- 内置恢复中间件可防止服务器因内核崩溃而导致崩溃。 - JSON 验证- 自动请求/响应 JSON 绑定和验证 - 路由分组- 组织相关路由并应用通用中间件 - 错误管理- 集中式错误处理和日志记录 - 内置渲染功能- 支持 JSON、XML、HTML 模板等 - 可扩展性强——拥有庞大的社区中间件和插件生态系统二、入门 2.1 环境条件- Go 版本:Gin 需要Go版本1.23或更高版本。 - 基本的 Go 语言知识:熟悉 Go 语言语法和包管理会有帮助。2.2 安装借助Go 的模块支持,只需在代码中导入 Gin,Go 就会在构建过程中自动获取它: import "github.com/gin-gonic/gin"三、案例package main import ( "net/http" "github.com/gin-gonic/gin" ) func main() { // Create a Gin router with default middleware (logger and recovery) r := gin.Default() // Define a simple GET endpoint r.GET("/ping", func(c *gin.Context) { // Return JSON response c.JSON(http.StatusOK, gin.H{ "message": "pong", }) }) // Start server on port 8080 (default) // Server will listen on 0.0.0.0:8080 (localhost:8080 on Windows) r.Run() }打开浏览器并访问http://localhost:8080/ping 创建带有默认中间件的 Gin 路由器 使用简单的处理函数定义 HTTP 端点 返回 JSON 响应 启动 HTTP 服务器
 -
gin Engine(路由器/入口) → HandlerFunc(处理函数) → Context(请求上下文)// 经典模版 r := gin.Default() r.GET("/ping", func(c *gin.Context) { c.JSON(200, gin.H{"msg": "pong"}) }) r.Run(":8080")所有 Gin 的东西基本都能从这里长出来: 想加中间件:r.Use(...) 想分组:g := r.Group("/api") 想绑定参数:c.Param / c.Query / c.ShouldBindJSON 想返回:c.JSON / c.String / c.Status建议你先只覆盖 80% 场景的 12 个: 路由/中间件 gin.Default() / gin.New() r.Use(mw...) r.GET/POST/... r.Group("/xx") 取数据 c.Param("id")(路径参数) c.Query("k")(query 参数) c.GetHeader("Authorization") c.ShouldBindJSON(&obj)(JSON body) 回数据 c.JSON(code, obj) c.String(code, "text") c.Status(code) c.AbortWithStatusJSON(code, obj)(中断链路)package main import ( "github.com/gin-gonic/gin" "net/http" ) func main() { // 创建一个默认的路由引擎 r := gin.Default() // 注册一个GET 路由: 访问/ping 返回JSON r.GET("/ping", func(c *gin.Context) { //c.JSON(200, map[string]interface{}{ // "message": "pong", //}) // 上面的写法等同于下面的 c.JSON(http.StatusOK, gin.H{ "message": "pong", }) }) // /hello?name=Tom r.GET("/hello", func(c *gin.Context) { // ? 后面的叫 查询参数(Query String): //name 是参数名 //Tom 是参数值 //如果是 /hello?name=Tom&age=18: //name → Tom //age → 18 //c.Query("name") 做了什么? //c.Query("name") 就是从 URL 的 query 里拿值: name := c.Query("name") // 获取 query参数 在URL后面加上/hello?name=Tom 返回的结果就是 hello, Tom! 如果只访问/hello 就返回下面默认的 hello,world! age := c.Query("age") if name == "" { name = "world" } if age == "" { age = "18" } c.String(http.StatusOK, "hello, %s , age %s!", name, age) }) r.Run() }
-
函数 一、闭包函数func startWorker(id int) { go func() { for { fmt.Printf("Worker %d is woerkding\n", id) time.Sleep(time.Second) // 默认一秒 break } }() } //上面go代表着异步执行 //()等于马上执行一次 func NewCounter() func() int { count := 0 return func() int { count++ return count } } // 上面函数需要外部调用执行 里面会保留结果 N := NewCounter() 后面每fmt.Println(N())一次就结果就会变 每次打印就会自动执行一遍
-
字符串拼接 一、字符串拼接 1.1 + 运算s2 := s1 + name优点:最直观,少量片段时也最快。单个表达式里 a + b + c 编译器会预估长度、仅一次分配。 注意:在循环中做 s += part 会导致多次分配与拷贝(可能退化 O(n^2)),应改为 Builder/Buffer 或先收集后 Join。 适用:2–5 个固定小片段、对性能要求一般的场景;常量拼接会在编译期完成(零开销)。1.2 strings.Joind4 := strings.Join([]string{d1, d2}, ",")优点:已在切片里、有统一分隔符(如 ,、|、空串)时,一次性预分配,通常是多段连接的首选。 适用:CSV/日志行拼接、URL path/标签列表、SQL 占位符 "?,?,?" 之类模式。 小技巧:先 make([]string, 0, n) 收集,再 strings.Join(parts, sep) 可减少切片扩容。1.3 fmt.Sprintfd3 := fmt.Sprintf("%s,%s", d1, d2)// 优点:格式化强、跨类型方便(%d、%.2f、对齐宽度等)。 // 缺点:需要解析格式串,最慢、分配也更多。 // 适用:确实需要格式化能力(尤其跨类型)时;在性能敏感路径尽量用 strconv/Builder 代替: var b strings.Builder b.WriteString(name) b.WriteByte(',') b.WriteString(strconv.Itoa(age)) s := b.String()1.4 bytes.Buffervar buffer bytes.Buffer buffer.WriteString("tom") buffer.WriteString(",") buffer.WriteString("20") s := buffer.String()优点:实现了 io.Writer,与其它 Writer/Reader 组合很方便,既可写字符串也可写字节。 注意:buffer.String() 会拷贝内部 []byte 生成字符串(因此会有一次分配)。 适用:需要同时处理 []byte、或与文件/网络/压缩流等 IO 组件对接时;如果最终只要 string,通常改用 strings.Builder 更省。1.5 strings.Buildervar sb strings.Builder sb.Grow(64) // 可选:大致预估长度 sb.WriteString("tom") sb.WriteByte(',') sb.WriteString("20") s := sb.String() // 通常零拷贝拿到字符串优点:零值可用;为构造字符串而生,String() 返回结果通常不拷贝底层数据;也实现 io.Writer。 注意:不要拷贝已使用过的 Builder(按值传递会出问题);非并发安全。 适用:循环里逐步构建字符串、性能敏感路径、最终产出是 string 的情况。二、常见场景的推荐写法 2.1 循环里累计很多片段(性能敏感)//用 strings.Builder 或 bytes.Buffer(只要字符串就用 Builder) var b strings.Builder b.Grow(1024) // 如果能粗略估计长度 for _, p := range parts { b.WriteString(p) b.WriteByte(',') } s := b.String()2.2 已有切片 + 统一分隔符 (用 strings.Join)s := strings.Join(parts, ",")2.3 少量固定片段 用 +s := "hello " + name2.4 需要格式化/跨类型// 用 fmt.Sprintf(或 strconv + Builder 更高性能) s := fmt.Sprintf("%s(%d)", name, age) // 或 var b strings.Builder b.WriteString(name) b.WriteByte('(') b.WriteString(strconv.Itoa(age)) b.WriteByte(')') s := b.String()2.5 小坑与小技巧- +/Sprintf 都不适合在大循环内反复累加;会频繁分配。 - strings.Builder/bytes.Buffer 都不是并发安全;不要在多个 goroutine 同时写。 - strings.Builder 的实例不要复制(作为函数参数请传指针或在内部新建)。 - bytes.Buffer 的 String() 每次都会生成新字符串;避免在热路径里对同一个 Buffer 反复 String()。 - 需要固定宽度、小数位、对齐等格式控制时,fmt 家族清晰可读;对极致性能,优先 strconv.Append* 系列 + Builder/Buffer。三、转义字符
-
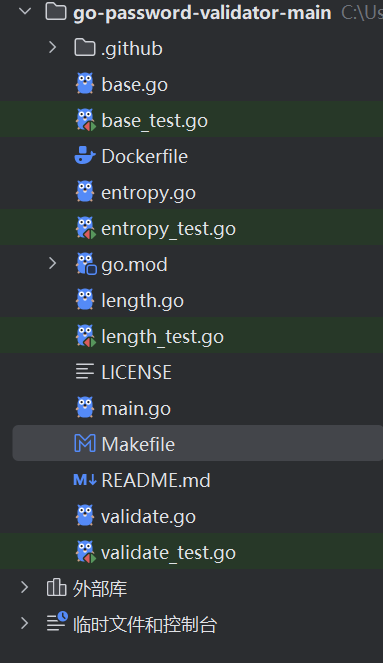
容器化 + 上线到 K8s + 被 Prom 抓取 容器化 + 上线到 K8s + 被 Prom 抓取 目标:Exporter 以容器形式部署到集群,并被 Prometheus 抓取。 任务 构建镜像并 push:make docker IMG=…。 应用 k8s/deployment.yaml + Service;为你的命名空间调好 selector。 如果你集群用 Prometheus Operator,创建 ServiceMonitor 让它自动发现 scrape 目标。 Prometheus target 变为 Up,图表能看到你的新指标。 若用 Operator,ServiceMonitor 生效(label 选择器正确)。一、准备条件你有 Docker、kubectl 权限,能访问集群。 Harbor 私有仓库可用(如果是私有,需要在 K8s 里创建 imagePullSecret,步骤见第 4 步)。 Exporter 监听 0.0.0.0:9090 且有 /metrics(若没有,见“可选:最小 main.go”)。二、(可选)最小 main.go(若你项目还没暴露 /metrics)在你的可执行入口里加入(或新建 main.go):package main import ( "log" "net/http" "github.com/prometheus/client_golang/prometheus" "github.com/prometheus/client_golang/prometheus/collectors" "github.com/prometheus/client_golang/prometheus/promhttp" ) func main() { reg := prometheus.NewRegistry() reg.MustRegister(collectors.NewGoCollector(), collectors.NewProcessCollector(collectors.ProcessCollectorOpts{})) // TODO: 在这里注册你自己的指标 reg.MustRegister(yourMetric) mux := http.NewServeMux() mux.Handle("/metrics", promhttp.HandlerFor(reg, promhttp.HandlerOpts{})) //(若你有 /live、/ready 就更好) mux.HandleFunc("/live", func(w http.ResponseWriter, r *http.Request) { w.WriteHeader(200) }) mux.HandleFunc("/ready", func(w http.ResponseWriter, r *http.Request) { w.WriteHeader(200) }) log.Println("listening on :9090") log.Fatal(http.ListenAndServe(":9090", mux)) } 三、Dockerfile(多阶段构建,体积小、非 root 运行) 在项目根目录新建 Dockerfile:root@k8s-03:/woke/go-password-validator-main# cat Dockerfile # ---- build ---- FROM golang:1.23-alpine AS build WORKDIR /src COPY go.mod go.sum ./ RUN go mod download COPY . . # 如果入口在仓库根目录的 main.go: RUN CGO_ENABLED=0 GOOS=linux GOARCH=amd64 \ go build -ldflags="-s -w" -o /out/exporter . # ---- runtime ---- FROM gcr.io/distroless/static:nonroot USER nonroot:nonroot COPY --from=build /out/exporter /exporter EXPOSE 9090 ENTRYPOINT ["/exporter"] 四、Makefile 目标 在项目根目录的 Makefile 增加:root@k8s-03:/woke/go-password-validator-main# cat Makefile # ---------- 现有的目标,保留 ---------- test: go test ./... fmt: go fmt ./... vet: go vet ./... install-lint: # 建议用 go install(Go 1.16+) go install golang.org/x/lint/golint@latest @go env GOPATH >/dev/null lint: go list ./... | grep -v /vendor/ | xargs -L1 golint -set_exit_status install-staticcheck: go install honnef.co/go/tools/cmd/staticcheck@latest staticcheck: staticcheck -f stylish ./... # ---------- Docker 相关,新增 ---------- REGISTRY ?= 192.168.30.180:30003 REPO ?= test/go TAG ?= $(shell date +%Y%m%d-%H%M%S) IMG := $(REGISTRY)/$(REPO):$(TAG) .PHONY: docker docker-build docker-push docker: docker-build docker-push docker-build: docker build -t $(IMG) . docker-push: docker push $(IMG) 使用:# 登录你的 Harbor docker login harbor.example.com # 构建并 push(替换成你自己的 Harbor 项目/镜像名) make docker IMG=harbor.example.com/ops/go-password-exporter:v0.1.0 #如果配置好了Makefile文件 可以直接执行 make docker 也可以像上面这样定制五、Harbor 私有仓库拉取凭据(K8s imagePullSecret)注意:imagePullSecret 是命名空间级的,需要在哪个 ns 拉镜像,就在哪个 ns 创建;要全局通用只能在每个 ns 都创建(或用准入控制器自动注入)。#示例,在 monitoring 命名空间创建: kubectl -n monitoring create secret docker-registry harbor-cred \ --docker-server=192.168.30.180:30003 \ --docker-username='admin' \ --docker-password='Harbor12345' \ --docker-email='ops@example.com' 六、部署到 K8s(Deployment + Service)#deployment.yaml apiVersion: apps/v1 kind: Deployment metadata: name: pass-validator-exporter namespace: monitoring labels: app.kubernetes.io/name: pass-validator-exporter spec: replicas: 1 selector: matchLabels: app.kubernetes.io/name: pass-validator-exporter template: metadata: labels: app.kubernetes.io/name: pass-validator-exporter spec: imagePullSecrets: - name: harbor-cred containers: - name: exporter image: 192.168.30.180:30003/test/go:20250905-154053 imagePullPolicy: IfNotPresent ports: - name: http containerPort: 9090 readinessProbe: httpGet: { path: /ready, port: http } initialDelaySeconds: 3 periodSeconds: 5 livenessProbe: httpGet: { path: /live, port: http } initialDelaySeconds: 10 periodSeconds: 10 resources: requests: { cpu: "50m", memory: "64Mi" } limits: { cpu: "200m", memory: "128Mi" } securityContext: allowPrivilegeEscalation: false readOnlyRootFilesystem: true runAsNonRoot: true runAsUser: 65532#service.yaml apiVersion: v1 kind: Service metadata: name: pass-validator-exporter namespace: monitoring labels: app.kubernetes.io/name: pass-validator-exporter # 若你是“裸 Prometheus + 注解发现”,可打开以下注解: # annotations: # prometheus.io/scrape: "true" # prometheus.io/path: "/metrics" # prometheus.io/port: "9090" spec: type: ClusterIP selector: app.kubernetes.io/name: pass-validator-exporter ports: - name: http port: 9090 targetPort: http kubectl apply -f k8s/deployment.yaml kubectl apply -f k8s/service.yaml # 验证: kubectl -n monitoring get pods -l app.kubernetes.io/name=pass-validator-exporter -w kubectl -n monitoring get svc pass-validator-exporter # 本地看指标(可选): kubectl -n monitoring port-forward svc/pass-validator-exporter 19090:9090 curl http://127.0.0.1:19090/metrics | head七、让 Prometheus 抓取方案 A:你在用 Prometheus Operator / kube-prometheus-stack(推荐) 关键点:ServiceMonitor 的 selector 要能匹配到 Service 的 label;同时 ServiceMonitor 自己的 label 要匹配到 Prometheus 实例的 serviceMonitorSelector。大多数 Helm 安装用的 label 是 release: kube-prometheus-stack(按你的集群实际为准)。# 看 Prometheus 实例的 selector 要求(取第一个 Prometheus 资源) kubectl -n monitoring get prometheus -o jsonpath='{.items[0].spec.serviceMonitorSelector.matchLabels}{"\n"}' # 一般会看到 {"release":"<你的 Helm release 名>"}#创建 servicemonitor.yaml 如果上面没有查到直接删除 labels: # release: kube-prometheus-stack # ←改成你 Prometheus 实例在选的那个 label apiVersion: monitoring.coreos.com/v1 kind: ServiceMonitor metadata: name: pass-validator-exporter namespace: monitoring labels: release: kube-prometheus-stack # ←改成你 Prometheus 实例在选的那个 label spec: namespaceSelector: matchNames: ["monitoring"] selector: matchLabels: app.kubernetes.io/name: pass-validator-exporter # 要和 Service 的 label 完全一致 endpoints: - port: http # 要和 Service 端口名一致 path: /metrics interval: 15s scrapeTimeout: 10s#应用并验证: kubectl apply -f servicemonitor.yaml # 在 Prometheus UI -> Status -> Targets 里应该出现你的 target,并且是 UP。 #启动pod测试集群内获取是否正常 kubectl -n monitoring run tmp-curl --rm -it --image=curlimages/curl --restart=Never \ -- http://pass-validator-exporter.monitoring.svc:9090/metrics | head #可以在浏览器IP+端口访问 kubectl -n monitoring port-forward --address 0.0.0.0 svc/prometheus-k8s 9090:9090方案 B:裸 Prometheus(没装 Operator)你需要在 Prometheus 的 prometheus.yml 里启用 kubernetes_sd_configs,并用注解过滤(上面 Service 已给注解示例)。典型片段如下(放到你的 scrape_configs 里):- job_name: 'kubernetes-services' kubernetes_sd_configs: - role: endpoints relabel_configs: - source_labels: [__meta_kubernetes_service_annotation_prometheus_io_scrape] action: keep regex: "true" - source_labels: [__meta_kubernetes_service_annotation_prometheus_io_path] action: replace target: __metrics_path__ regex: "(.+)" - source_labels: [__address__, __meta_kubernetes_service_annotation_prometheus_io_port] action: replace target: __address__ regex: (.+?)(?::\d+)?;(\d+) replacement: $1:$2 #改好配置后重启 Prometheus,去 Targets 看是否 UP。八、迭代上线(改代码后快速发版)# 1) 构建并推送新镜像 make docker IMG=harbor.example.com/ops/go-password-exporter:v0.1.1 # 2) 滚动更新 Deployment(或直接改 yaml) kubectl -n monitoring set image deploy/pass-validator-exporter exporter=harbor.example.com/ops/go-password-exporter:v0.1.1 kubectl -n monitoring rollout status deploy/pass-validator-exporter 九、验收清单Prometheus Targets 里看到 pass-validator-exporter → UP。 在 Prometheus 或 Grafana 中能查询到你的新指标(例如:your_metric_name)。 如果是 Operator:ServiceMonitor 的 labels.release 与 Prometheus 实例选择器 匹配;ServiceMonitor.spec.selector.matchLabels 与 Service 的 labels 匹配;endpoints.port 与 Service 端口名 一致。十、常见坑速查镜像拉不下来:Deployment 没配置 imagePullSecrets,或 secret 在错的命名空间。 Target 一直 DOWN:容器没监听 0.0.0.0;端口/路径不一致;Service 选择器写错;endpoints.port 名字不对。 Operator 抓不到:ServiceMonitor 的 labels 与 Prometheus 的 serviceMonitorSelector 不匹配。 /metrics 超时:指标收集阻塞(锁/IO);建议拆分收集逻辑并设置 scrapeTimeout。 权限:Exporter 是 HTTP 只读,不需要额外 RBAC。