搜索到
97
篇与
的结果
-
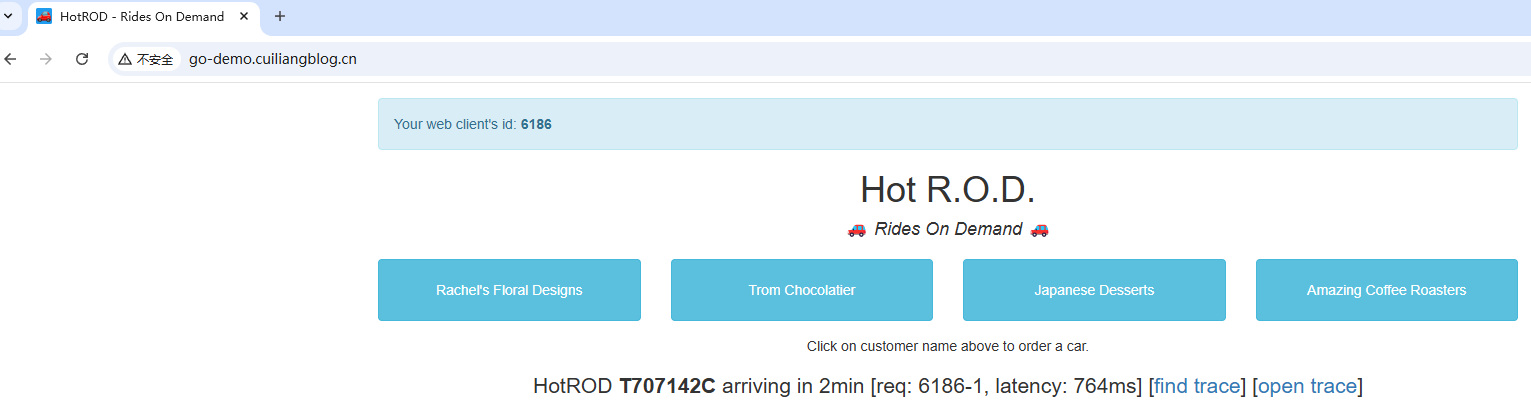
 链路追踪数据收集与导出 链路追踪数据收集与导出一、链路数据收集方案在 Kubernetes 中部署应用进行链路追踪数据收集,常见有两种方案: 1、基于 Instrumentation Operator 的自动注入(自动埋点) 通过部署 OpenTelemetry Operator,并创建 Instrumentation 自定义资源(CRD),实现对应用容器的自动注入 SDK 或 Sidecar,从而无需修改应用代码即可采集追踪数据。适合需要快速接入、统一管理、降低改造成本的场景。 2、手动在应用中集成 OpenTelemetry SDK(手动埋点) 在应用程序代码中直接引入 OpenTelemetry SDK,手动埋点关键业务逻辑,控制 trace span 的粒度和内容,并将数据通过 OTLP(OpenTelemetry Protocol)协议导出到后端(如 OpenTelemetry Collector、Jaeger、Tempo 等)。适合需要精准控制追踪数据质量或已有自定义采集需求的场景。 接下来以Instrumentation Operator自动注入方式演示如何收集并处理数据。二、部署测试应用接下来我们部署一个HotROD 演示程序,它内置了OpenTelemetry SDK,我们只需要配置 opentelemetry 接收地址既可,具体可参考文档: https://github.com/jaegertracing/jaeger/tree/main/examples/hotrodapiVersion: apps/v1 kind: Deployment metadata: name: go-demo spec: selector: matchLabels: app: go-demo template: metadata: labels: app: go-demo spec: containers: - name: go-demo image: jaegertracing/example-hotrod:latest imagePullPolicy: IfNotPresent resources: limits: memory: "500Mi" cpu: "200m" ports: - containerPort: 8080 env: - name: OTEL_EXPORTER_OTLP_ENDPOINT # opentelemetry服务地址 value: http://center-collector.opentelemetry.svc:4318 --- apiVersion: v1 kind: Service metadata: name: go-demo spec: selector: app: go-demo ports: - port: 8080 targetPort: 8080 --- apiVersion: traefik.io/v1alpha1 kind: IngressRoute metadata: name: go-demo spec: entryPoints: - web routes: - match: Host(`go-demo.cuiliangblog.cn`) kind: Rule services: - name: go-demo port: 8080接下来浏览器添加 hosts 解析后访问测试三、Jaeger方案 3.1Jaeger介绍 Jaeger 是Uber公司研发,后来贡献给CNCF的一个分布式链路追踪软件,主要用于微服务链路追踪。它优点是性能高(能处理大量追踪数据)、部署灵活(支持单节点和分布式部署)、集成方便(兼容 OpenTelemetry),并且可视化能力强,可以快速定位性能瓶颈和故障。基于上述示意图,我们简要解析下 Jaeger 各个组件以及组件间的关系: Client libraries(客户端库) 功能:将追踪信息(trace/span)插入到应用程序中。 说明: 支持多种语言,如 Go、Java、Python、Node.js 等。 通常使用 OpenTelemetry SDK 或 Jaeger Tracer。 将生成的追踪数据发送到 Agent 或 Collector。 Agent(代理) 功能:接收客户端发来的追踪数据,批量转发给 Collector。 说明: 接收 UDP 数据包(更轻量) 向 Collector 使用 gRPC 发送数据 Collector(收集器) 功能: 接收 Agent 或直接从 SDK 发送的追踪数据。 处理(转码、校验等)后写入存储后端。 可横向扩展,提高吞吐能力。 Ingester(摄取器)(可选) 功能:在使用 Kafka 作为中间缓冲队列时,Ingester 从 Kafka 消费数据并写入存储。 用途:解耦收集与存储、提升稳定性。 Storage Backend(存储后端) 功能:保存追踪数据,供查询和分析使用。 支持: Elasticsearch Cassandra Kafka(用于异步摄取) Badger(仅用于开发) OpenSearch Query(查询服务) 功能:从存储中查询追踪数据,提供给前端 UI 使用。 提供 API 接口:供 UI 或其他系统(如 Grafana Tempo)调用。 UI(前端界面) 功能: 可视化展示 Trace、Span、服务依赖图。 支持搜索条件(服务名、时间范围、trace ID 等)。 常用用途: 查看慢请求 分析请求调用链 排查错误或瓶颈 在本示例中,指标数据采集与收集由 OpenTelemetry 实现,仅需要使用 jaeger-collector 组件接收输入,存入 elasticsearch,使用 jaeger-query 组件查询展示数据既可。3.2部署 Jaeger(all in one)apiVersion: apps/v1 kind: Deployment metadata: name: jaeger namespace: opentelemetry labels: app: jaeger spec: replicas: 1 selector: matchLabels: app: jaeger template: metadata: labels: app: jaeger spec: containers: - name: jaeger image: jaegertracing/all-in-one:latest args: - "--collector.otlp.enabled=true" # 启用 OTLP gRPC - "--collector.otlp.grpc.host-port=0.0.0.0:4317" resources: limits: memory: "2Gi" cpu: "1" ports: - containerPort: 6831 protocol: UDP - containerPort: 16686 protocol: TCP - containerPort: 4317 protocol: TCP --- apiVersion: v1 kind: Service metadata: name: jaeger namespace: opentelemetry labels: app: jaeger spec: selector: app: jaeger ports: - name: jaeger-udp port: 6831 targetPort: 6831 protocol: UDP - name: jaeger-ui port: 16686 targetPort: 16686 protocol: TCP - name: otlp-grpc port: 4317 targetPort: 4317 protocol: TCP --- apiVersion: traefik.io/v1alpha1 kind: IngressRoute metadata: name: jaeger namespace: opentelemetry spec: entryPoints: - web routes: - match: Host(`jaeger.cuiliangblog.cn`) kind: Rule services: - name: jaeger port: 166863.3部署 Jaeger(分布式)all in one 数据存放在内存中不具备高可用性,生产环境中建议使用Elasticsearch 或 OpenSearch 作为 Cassandra 的存储后端,以 ElasticSearch 为例,部署操作具体可参考文档:https://www.cuiliangblog.cn/detail/section/162609409导出 ca 证书# kubectl -n elasticsearch get secret elasticsearch-es-http-certs-public -o go-template='{{index .data "ca.crt" | base64decode }}' > ca.crt # kubectl create secret -n opentelemetry generic es-tls-secret --from-file=ca.crt=./ca.crt secret/es-tls-secret created获取 chart 包# helm repo add jaegertracing https://jaegertracing.github.io/helm-charts "jaegertracing" has been added to your repositories # helm search repo jaegertracing NAME CHART VERSION APP VERSION DESCRIPTION jaegertracing/jaeger 3.4.1 1.53.0 A Jaeger Helm chart for Kubernetes jaegertracing/jaeger-operator 2.57.0 1.61.0 jaeger-operator Helm chart for Kubernetes # helm pull jaegertracing/jaeger --untar # cd jaeger # ls Chart.lock charts Chart.yaml README.md templates values.yaml修改安装参数apiVersion: v1 kind: ServiceAccount metadata: name: jaeger-collector labels: helm.sh/chart: jaeger-3.4.1 app.kubernetes.io/name: jaeger app.kubernetes.io/instance: jaeger app.kubernetes.io/version: "1.53.0" app.kubernetes.io/managed-by: Helm app.kubernetes.io/component: collector automountServiceAccountToken: false --- # Source: jaeger/templates/query-sa.yaml apiVersion: v1 kind: ServiceAccount metadata: name: jaeger-query labels: helm.sh/chart: jaeger-3.4.1 app.kubernetes.io/name: jaeger app.kubernetes.io/instance: jaeger app.kubernetes.io/version: "1.53.0" app.kubernetes.io/managed-by: Helm app.kubernetes.io/component: query automountServiceAccountToken: false --- # Source: jaeger/templates/spark-sa.yaml apiVersion: v1 kind: ServiceAccount metadata: name: jaeger-spark labels: helm.sh/chart: jaeger-3.4.1 app.kubernetes.io/name: jaeger app.kubernetes.io/instance: jaeger app.kubernetes.io/version: "1.53.0" app.kubernetes.io/managed-by: Helm app.kubernetes.io/component: spark automountServiceAccountToken: false --- # Source: jaeger/templates/collector-svc.yaml apiVersion: v1 kind: Service metadata: name: jaeger-collector labels: helm.sh/chart: jaeger-3.4.1 app.kubernetes.io/name: jaeger app.kubernetes.io/instance: jaeger app.kubernetes.io/version: "1.53.0" app.kubernetes.io/managed-by: Helm app.kubernetes.io/component: collector spec: ports: - name: grpc port: 14250 protocol: TCP targetPort: grpc appProtocol: grpc - name: http port: 14268 protocol: TCP targetPort: http appProtocol: http - name: otlp-grpc port: 4317 protocol: TCP targetPort: otlp-grpc - name: otlp-http port: 4318 protocol: TCP targetPort: otlp-http - name: admin port: 14269 targetPort: admin selector: app.kubernetes.io/name: jaeger app.kubernetes.io/instance: jaeger app.kubernetes.io/component: collector type: ClusterIP --- # Source: jaeger/templates/query-svc.yaml apiVersion: v1 kind: Service metadata: name: jaeger-query labels: helm.sh/chart: jaeger-3.4.1 app.kubernetes.io/name: jaeger app.kubernetes.io/instance: jaeger app.kubernetes.io/version: "1.53.0" app.kubernetes.io/managed-by: Helm app.kubernetes.io/component: query spec: ports: - name: query port: 80 protocol: TCP targetPort: query - name: grpc port: 16685 protocol: TCP targetPort: grpc - name: admin port: 16687 protocol: TCP targetPort: admin selector: app.kubernetes.io/name: jaeger app.kubernetes.io/instance: jaeger app.kubernetes.io/component: query type: ClusterIP --- # Source: jaeger/templates/collector-deploy.yaml apiVersion: apps/v1 kind: Deployment metadata: name: jaeger-collector labels: helm.sh/chart: jaeger-3.4.1 app.kubernetes.io/name: jaeger app.kubernetes.io/instance: jaeger app.kubernetes.io/version: "1.53.0" app.kubernetes.io/managed-by: Helm app.kubernetes.io/component: collector spec: replicas: 1 selector: matchLabels: app.kubernetes.io/name: jaeger app.kubernetes.io/instance: jaeger app.kubernetes.io/component: collector template: metadata: annotations: checksum/config-env: 75a11da44c802486bc6f65640aa48a730f0f684c5c07a42ba3cd1735eb3fb070 labels: app.kubernetes.io/name: jaeger app.kubernetes.io/instance: jaeger app.kubernetes.io/component: collector spec: securityContext: {} serviceAccountName: jaeger-collector containers: - name: jaeger-collector securityContext: {} image: registry.cn-guangzhou.aliyuncs.com/xingcangku/jaeger-collector:1.53.0 imagePullPolicy: IfNotPresent args: env: - name: COLLECTOR_OTLP_ENABLED value: "true" - name: SPAN_STORAGE_TYPE value: elasticsearch - name: ES_SERVER_URLS value: https://elasticsearch-client.elasticsearch.svc:9200 - name: ES_TLS_SKIP_HOST_VERIFY # 添加临时跳过主机名验证 value: "true" - name: ES_USERNAME value: elastic - name: ES_PASSWORD valueFrom: secretKeyRef: name: jaeger-elasticsearch key: password - name: ES_TLS_ENABLED value: "true" - name: ES_TLS_CA value: /es-tls/ca.crt ports: - containerPort: 14250 name: grpc protocol: TCP - containerPort: 14268 name: http protocol: TCP - containerPort: 14269 name: admin protocol: TCP - containerPort: 4317 name: otlp-grpc protocol: TCP - containerPort: 4318 name: otlp-http protocol: TCP readinessProbe: httpGet: path: / port: admin livenessProbe: httpGet: path: / port: admin resources: {} volumeMounts: - name: es-tls-secret mountPath: /es-tls/ca.crt subPath: ca-cert.pem readOnly: true dnsPolicy: ClusterFirst restartPolicy: Always volumes: - name: es-tls-secret secret: secretName: es-tls-secret --- # Source: jaeger/templates/query-deploy.yaml apiVersion: apps/v1 kind: Deployment metadata: name: jaeger-query labels: helm.sh/chart: jaeger-3.4.1 app.kubernetes.io/name: jaeger app.kubernetes.io/instance: jaeger app.kubernetes.io/version: "1.53.0" app.kubernetes.io/managed-by: Helm app.kubernetes.io/component: query spec: replicas: 1 selector: matchLabels: app.kubernetes.io/name: jaeger app.kubernetes.io/instance: jaeger app.kubernetes.io/component: query template: metadata: labels: app.kubernetes.io/name: jaeger app.kubernetes.io/instance: jaeger app.kubernetes.io/component: query spec: securityContext: {} serviceAccountName: jaeger-query containers: - name: jaeger-query securityContext: {} image: registry.cn-guangzhou.aliyuncs.com/xingcangku/jaegertracing-jaeger-query:1.53.0 imagePullPolicy: IfNotPresent args: env: - name: SPAN_STORAGE_TYPE value: elasticsearch - name: ES_SERVER_URLS value: https://elasticsearch-client.elasticsearch.svc:9200 - name: ES_TLS_SKIP_HOST_VERIFY # 添加临时跳过主机名验证 value: "true" - name: ES_USERNAME value: elastic - name: ES_PASSWORD valueFrom: secretKeyRef: name: jaeger-elasticsearch key: password - name: ES_TLS_ENABLED value: "true" - name: ES_TLS_CA value: /es-tls/ca.crt - name: QUERY_BASE_PATH value: "/" - name: JAEGER_AGENT_PORT value: "6831" ports: - name: query containerPort: 16686 protocol: TCP - name: grpc containerPort: 16685 protocol: TCP - name: admin containerPort: 16687 protocol: TCP resources: {} volumeMounts: - name: es-tls-secret mountPath: /es-tls/ca.crt subPath: ca-cert.pem readOnly: true livenessProbe: httpGet: path: / port: admin readinessProbe: httpGet: path: / port: admin - name: jaeger-agent-sidecar securityContext: {} image: registry.cn-guangzhou.aliyuncs.com/xingcangku/jaegertracing-jaeger-agent:1.53.0 imagePullPolicy: IfNotPresent args: env: - name: REPORTER_GRPC_HOST_PORT value: jaeger-collector:14250 ports: - name: admin containerPort: 14271 protocol: TCP resources: null volumeMounts: livenessProbe: httpGet: path: / port: admin readinessProbe: httpGet: path: / port: admin dnsPolicy: ClusterFirst restartPolicy: Always volumes: - name: es-tls-secret secret: secretName: es-tls-secret --- # Source: jaeger/templates/spark-cronjob.yaml apiVersion: batch/v1 kind: CronJob metadata: name: jaeger-spark labels: helm.sh/chart: jaeger-3.4.1 app.kubernetes.io/name: jaeger app.kubernetes.io/instance: jaeger app.kubernetes.io/version: "1.53.0" app.kubernetes.io/managed-by: Helm app.kubernetes.io/component: spark spec: schedule: "49 23 * * *" successfulJobsHistoryLimit: 5 failedJobsHistoryLimit: 5 concurrencyPolicy: Forbid jobTemplate: spec: template: metadata: labels: app.kubernetes.io/name: jaeger app.kubernetes.io/instance: jaeger app.kubernetes.io/component: spark spec: serviceAccountName: jaeger-spark securityContext: {} containers: - name: jaeger-spark image: registry.cn-guangzhou.aliyuncs.com/xingcangku/jaegertracing-spark-dependencies:latest imagePullPolicy: IfNotPresent args: env: - name: STORAGE value: elasticsearch - name: ES_SERVER_URLS value: https://elasticsearch-client.elasticsearch.svc:9200 - name: ES_USERNAME value: elastic - name: ES_PASSWORD valueFrom: secretKeyRef: name: jaeger-elasticsearch key: password - name: ES_TLS_ENABLED value: "true" - name: ES_TLS_CA value: /es-tls/ca.crt - name: ES_NODES value: https://elasticsearch-client.elasticsearch.svc:9200 - name: ES_NODES_WAN_ONLY value: "false" resources: {} volumeMounts: securityContext: {} restartPolicy: OnFailure volumes: --- # Source: jaeger/templates/elasticsearch-secret.yaml apiVersion: v1 kind: Secret metadata: name: jaeger-elasticsearch labels: helm.sh/chart: jaeger-3.4.1 app.kubernetes.io/name: jaeger app.kubernetes.io/instance: jaeger app.kubernetes.io/version: "1.53.0" app.kubernetes.io/managed-by: Helm annotations: "helm.sh/hook": pre-install,pre-upgrade "helm.sh/hook-weight": "-1" "helm.sh/hook-delete-policy": before-hook-creation "helm.sh/resource-policy": keep type: Opaque data: password: "ZWdvbjY2Ng=="安装 jaegerroot@k8s01:~/helm/jaeger/jaeger# kubectl delete -n opentelemetry -f test.yaml serviceaccount "jaeger-collector" deleted serviceaccount "jaeger-query" deleted serviceaccount "jaeger-spark" deleted service "jaeger-collector" deleted service "jaeger-query" deleted deployment.apps "jaeger-collector" deleted deployment.apps "jaeger-query" deleted cronjob.batch "jaeger-spark" deleted secret "jaeger-elasticsearch" deleted root@k8s01:~/helm/jaeger/jaeger# vi test.yaml root@k8s01:~/helm/jaeger/jaeger# kubectl apply -n opentelemetry -f test.yaml serviceaccount/jaeger-collector created serviceaccount/jaeger-query created serviceaccount/jaeger-spark created service/jaeger-collector created service/jaeger-query created deployment.apps/jaeger-collector created deployment.apps/jaeger-query created cronjob.batch/jaeger-spark created secret/jaeger-elasticsearch created root@k8s01:~/helm/jaeger/jaeger# kubectl get pods -n opentelemetry -w NAME READY STATUS RESTARTS AGE center-collector-78f7bbdf45-j798s 1/1 Running 2 (6h2m ago) 30h jaeger-7989549bb9-hn8jh 1/1 Running 2 (6h2m ago) 25h jaeger-collector-7f8fb4c946-nkg4m 1/1 Running 0 3s jaeger-query-5cdb7b68bd-xpftn 2/2 Running 0 3s ^Croot@k8s01:~/helm/jaeger/jaeger# kubectl get svc -n opentelemetry | grep jaeger jaeger ClusterIP 10.100.251.219 <none> 6831/UDP,16686/TCP,4317/TCP 25h jaeger-collector ClusterIP 10.111.17.41 <none> 14250/TCP,14268/TCP,4317/TCP,4318/TCP,14269/TCP 51s jaeger-query ClusterIP 10.98.118.118 <none> 80/TCP,16685/TCP,16687/TCP 51s创建 ingress 资源root@k8s01:~/helm/jaeger/jaeger# cat jaeger.yaml apiVersion: traefik.io/v1alpha1 kind: IngressRoute metadata: name: jaeger namespace: opentelemetry spec: entryPoints: - web routes: - match: Host(`jaeger.axinga.cn`) kind: Rule services: - name: jaeger port: 16686接下来配置 hosts 解析后浏览器访问既可。配置 CollectorapiVersion: opentelemetry.io/v1beta1 kind: OpenTelemetryCollector # 元数据定义部分 metadata: name: center # Collector 的名称为 center namespace: opentelemetry # 具体的配置内容 spec: replicas: 1 # 设置副本数量为1 config: # 定义 Collector 配置 receivers: # 接收器,用于接收遥测数据(如 trace、metrics、logs) otlp: # 配置 OTLP(OpenTelemetry Protocol)接收器 protocols: # 启用哪些协议来接收数据 grpc: endpoint: 0.0.0.0:4317 # 启用 gRPC 协议 http: endpoint: 0.0.0.0:4318 # 启用 HTTP 协议 processors: # 处理器,用于处理收集到的数据 batch: {} # 批处理器,用于将数据分批发送,提高效率 exporters: # 导出器,用于将处理后的数据发送到后端系统 # debug: {} # 使用 debug 导出器,将数据打印到终端(通常用于测试或调试) otlp: # 数据发送到jaeger的grpc端口 endpoint: "jaeger-collector:4317" tls: # 跳过证书验证 insecure: true service: # 服务配置部分 pipelines: # 定义处理管道 traces: # 定义 trace 类型的管道 receivers: [otlp] # 接收器为 OTLP processors: [batch] # 使用批处理器 exporters: [otlp] # 将数据发送到otlp接下来我们随机访问 demo 应用,并在 jaeger 查看链路追踪数据。Jaeger 系统找到了一些 trace 并显示了一些关于该 trace 的元数据,包括参与该 trace 的不同服务的名称以及每个服务发送到 Jaeger 的 span 记录数。jaeger 使用具体可参考文章https://medium.com/jaegertracing/take-jaeger-for-a-hotrod-ride-233cf43e46c2四、Tempo 方案4.1Tempo 介绍Grafana Tempo是一个开源、易于使用的大规模分布式跟踪后端。Tempo具有成本效益,仅需要对象存储即可运行,并且与Grafana,Prometheus和Loki深度集成,Tempo可以与任何开源跟踪协议一起使用,包括Jaeger、Zipkin和OpenTelemetry。它仅支持键/值查找,并且旨在与用于发现的日志和度量标准(示例性)协同工作Distributors(分发器) 功能:接收客户端发送的追踪数据并进行初步验证 说明: 对 Trace 进行分片、标签处理。 将数据转发给合适的 Ingesters。 Ingesters(摄取器) 功能:处理和持久化 Trace 数据 说明: 接收来自 Distributor 的数据。 在内存中缓存直到追踪完成(完整的 Trace)。 再写入后端对象存储。 Storage(对象存储) 功能:持久化存储 Trace 数据 说明: 支持多种对象存储(S3、GCS、MinIO、Azure Blob 等)。 Tempo 存储的是压缩的完整 Trace 文件,使用 trace ID 进行索引。 Compactor(数据压缩) 功能:合并 trace 数据,压缩多个小 block 成一个大 block。 说明: 可以单独运行 compactor 容器或进程。 通常以 后台任务 的方式运行,不参与实时 ingest 或 query。 Tempo Query(查询前端) 功能:处理来自用户或 Grafana 的查询请求 说明: 接收查询请求。 提供缓存、合并和调度功能,优化查询性能。 将请求转发给 Querier。 Querier(查询器) 功能:从存储中检索 Trace 数据 说明: 根据 trace ID 从对象存储中检索完整 trace。 解压和返回结构化的 Span 数据。 返回结果供 Grafana 或其他前端展示。4.2部署 Tempo推荐用Helm 安装,官方提供了tempo-distributed Helm chart 和 tempo Helm chart 两种部署模式,一般来说本地测试使用 tempo Helm chart,而生产环境可以使用 Tempo 的微服务部署方式 tempo-distributed。接下来以整体模式为例,具体可参考文档https://github.com/grafana/helm-charts/tree/main/charts/tempo 创建 s3 的 bucket、ak、sk 资源,并配置权限。具体可参考上面minio4.2.1获取 chart 包# helm repo add grafana https://grafana.github.io/helm-charts # helm pull grafana/tempo --untar # cd tempo # ls Chart.yaml README.md README.md.gotmpl templates values.yaml4.2.2修改配置,prometheus 默认未启用远程写入,可参考文章开启远程写入https://www.cuiliangblog.cn/detail/section/15189202# vim values.yaml tempo: storage: trace: # 默认使用本地文件存储,改为使用s3对象存储 backend: s3 s3: bucket: tempo # store traces in this bucket endpoint: minio-service.minio.svc:9000 # api endpoint access_key: zbsIQQnsp871ZnZ2AuKr # optional. access key when using static credentials. secret_key: zxL5EeXwU781M8inSBPcgY49mEbBVoR1lvFCX4JU # optional. secret key when using static credentials. insecure: true # 跳过证书验证4.2.3创建 temporoot@k8s01:~/helm/opentelemetry/tempo# cat test.yaml --- # Source: tempo/templates/serviceaccount.yaml apiVersion: v1 kind: ServiceAccount metadata: name: tempo namespace: opentelemetry labels: helm.sh/chart: tempo-1.23.1 app.kubernetes.io/name: tempo app.kubernetes.io/instance: tempo app.kubernetes.io/version: "2.8.0" app.kubernetes.io/managed-by: Helm automountServiceAccountToken: true --- # Source: tempo/templates/configmap-tempo.yaml apiVersion: v1 kind: ConfigMap metadata: name: tempo namespace: opentelemetry labels: helm.sh/chart: tempo-1.23.1 app.kubernetes.io/name: tempo app.kubernetes.io/instance: tempo app.kubernetes.io/version: "2.8.0" app.kubernetes.io/managed-by: Helm data: overrides.yaml: | overrides: {} tempo.yaml: | memberlist: cluster_label: "tempo.opentelemetry" multitenancy_enabled: false usage_report: reporting_enabled: true compactor: compaction: block_retention: 24h distributor: receivers: jaeger: protocols: grpc: endpoint: 0.0.0.0:14250 thrift_binary: endpoint: 0.0.0.0:6832 thrift_compact: endpoint: 0.0.0.0:6831 thrift_http: endpoint: 0.0.0.0:14268 otlp: protocols: grpc: endpoint: 0.0.0.0:4317 http: endpoint: 0.0.0.0:4318 ingester: {} server: http_listen_port: 3200 storage: trace: backend: s3 s3: access_key: admin bucket: tempo endpoint: minio-demo.minio.svc:9000 secret_key: 8fGYikcyi4 insecure: true #tls: false wal: path: /var/tempo/wal querier: {} query_frontend: {} overrides: defaults: {} per_tenant_override_config: /conf/overrides.yaml --- # Source: tempo/templates/service.yaml apiVersion: v1 kind: Service metadata: name: tempo namespace: opentelemetry labels: helm.sh/chart: tempo-1.23.1 app.kubernetes.io/name: tempo app.kubernetes.io/instance: tempo app.kubernetes.io/version: "2.8.0" app.kubernetes.io/managed-by: Helm spec: type: ClusterIP ports: - name: tempo-jaeger-thrift-compact port: 6831 protocol: UDP targetPort: 6831 - name: tempo-jaeger-thrift-binary port: 6832 protocol: UDP targetPort: 6832 - name: tempo-prom-metrics port: 3200 protocol: TCP targetPort: 3200 - name: tempo-jaeger-thrift-http port: 14268 protocol: TCP targetPort: 14268 - name: grpc-tempo-jaeger port: 14250 protocol: TCP targetPort: 14250 - name: tempo-zipkin port: 9411 protocol: TCP targetPort: 9411 - name: tempo-otlp-legacy port: 55680 protocol: TCP targetPort: 55680 - name: tempo-otlp-http-legacy port: 55681 protocol: TCP targetPort: 55681 - name: grpc-tempo-otlp port: 4317 protocol: TCP targetPort: 4317 - name: tempo-otlp-http port: 4318 protocol: TCP targetPort: 4318 - name: tempo-opencensus port: 55678 protocol: TCP targetPort: 55678 selector: app.kubernetes.io/name: tempo app.kubernetes.io/instance: tempo --- # Source: tempo/templates/statefulset.yaml apiVersion: apps/v1 kind: StatefulSet metadata: name: tempo namespace: opentelemetry labels: helm.sh/chart: tempo-1.23.1 app.kubernetes.io/name: tempo app.kubernetes.io/instance: tempo app.kubernetes.io/version: "2.8.0" app.kubernetes.io/managed-by: Helm spec: replicas: 1 selector: matchLabels: app.kubernetes.io/name: tempo app.kubernetes.io/instance: tempo serviceName: tempo-headless template: metadata: labels: app.kubernetes.io/name: tempo app.kubernetes.io/instance: tempo annotations: checksum/config: 563d333fcd3b266c31add18d53e0fa1f5e6ed2e1588e6ed4c466a8227285129b spec: serviceAccountName: tempo automountServiceAccountToken: true containers: - args: - -config.file=/conf/tempo.yaml - -mem-ballast-size-mbs=1024 image: registry.cn-guangzhou.aliyuncs.com/xingcangku/grafana-tempo-2.8.0:2.8.0 imagePullPolicy: IfNotPresent name: tempo ports: - containerPort: 3200 name: prom-metrics - containerPort: 6831 name: jaeger-thrift-c protocol: UDP - containerPort: 6832 name: jaeger-thrift-b protocol: UDP - containerPort: 14268 name: jaeger-thrift-h - containerPort: 14250 name: jaeger-grpc - containerPort: 9411 name: zipkin - containerPort: 55680 name: otlp-legacy - containerPort: 4317 name: otlp-grpc - containerPort: 55681 name: otlp-httplegacy - containerPort: 4318 name: otlp-http - containerPort: 55678 name: opencensus livenessProbe: failureThreshold: 3 httpGet: path: /ready port: 3200 initialDelaySeconds: 30 periodSeconds: 10 successThreshold: 1 timeoutSeconds: 5 readinessProbe: failureThreshold: 3 httpGet: path: /ready port: 3200 initialDelaySeconds: 20 periodSeconds: 10 successThreshold: 1 timeoutSeconds: 5 resources: {} env: volumeMounts: - mountPath: /conf name: tempo-conf securityContext: fsGroup: 10001 runAsGroup: 10001 runAsNonRoot: true runAsUser: 10001 volumes: - configMap: name: tempo name: tempo-conf updateStrategy: type: RollingUpdate root@k8s01:~/helm/opentelemetry/tempo# kubectl get pod -n opentelemetry NAME READY STATUS RESTARTS AGE center-collector-67dcddd7db-8hd98 1/1 Running 0 4h3m tempo-0 1/1 Running 35 (5h57m ago) 8d root@k8s01:~/helm/opentelemetry/tempo# kubectl get svc -n opentelemetry | grep tempo tempo ClusterIP 10.105.249.189 <none> 6831/UDP,6832/UDP,3200/TCP,14268/TCP,14250/TCP,9411/TCP,55680/TCP,55681/TCP,4317/TCP,4318/TCP,55678/TCP 8d root@k8s01:~/helm/opentelemetry/tempo# 4.2.4配置 Collector#按之前上面的完整配置 下面可以参考 tempo 服务的otlp 数据接收端口分别为4317(grpc)和4318(http),修改OpenTelemetryCollector 配置,将数据发送到 tempo 的 otlp 接收端口。 apiVersion: opentelemetry.io/v1beta1 kind: OpenTelemetryCollector # 元数据定义部分 metadata: name: center # Collector 的名称为 center namespace: opentelemetry # 具体的配置内容 spec: replicas: 1 # 设置副本数量为1 config: # 定义 Collector 配置 receivers: # 接收器,用于接收遥测数据(如 trace、metrics、logs) otlp: # 配置 OTLP(OpenTelemetry Protocol)接收器 protocols: # 启用哪些协议来接收数据 grpc: endpoint: 0.0.0.0:4317 # 启用 gRPC 协议 http: endpoint: 0.0.0.0:4318 # 启用 HTTP 协议 processors: # 处理器,用于处理收集到的数据 batch: {} # 批处理器,用于将数据分批发送,提高效率 exporters: # 导出器,用于将处理后的数据发送到后端系统 # debug: {} # 使用 debug 导出器,将数据打印到终端(通常用于测试或调试) otlp: # 数据发送到tempo的grpc端口 endpoint: "tempo:4317" tls: # 跳过证书验证 insecure: true service: # 服务配置部分 pipelines: # 定义处理管道 traces: # 定义 trace 类型的管道 receivers: [otlp] # 接收器为 OTLP processors: [batch] # 使用批处理器 exporters: [otlp] # 将数据打印到OTLP4.2.5访问验证4.2.6服务拓扑图配置Tempo Metrics Generator 是 Grafana Tempo 提供的一个 可选组件,用于将 Trace(链路追踪数据)转换为 Metrics(指标数据),从而实现 Trace-to-Metrics(T2M) 的能力,默认情况下 tempo 并未启用该功能。4.2.6.1prometheus 开启remote-write-receiver 功能,关键配置如下:# vim prometheus-prometheus.yaml spec: # enableFeatures: enableFeatures: # 开启远程写入 - remote-write-receiver externalLabels: web.enable-remote-write-receiver: "true" # kubectl apply -f prometheus-prometheus.yaml具体可参考文档:https://m.cuiliangblog.cn/detail/section/151892024.2.6.2tempo 开启metricsGenerator 功能,关键配置如下:# vim values.yaml global: per_tenant_override_config: /runtime-config/overrides.yaml metrics_generator_processors: - 'service-graphs' - 'span-metrics' tempo: metricsGenerator: enabled: true # 从 Trace 中自动生成 metrics(指标),用于服务调用关系图 remoteWriteUrl: "http://prometheus-k8s.monitoring.svc:9090/api/v1/write" # prometheus地址 overrides: # 多租户默认配置启用metrics defaults: metrics_generator: processors: - service-graphs - span-metrics4.2.6.3此时查询 prometheus 图表,可以获取traces 相关指标grafana 数据源启用节点图与服务图,配置如下查看服务图数据
 -
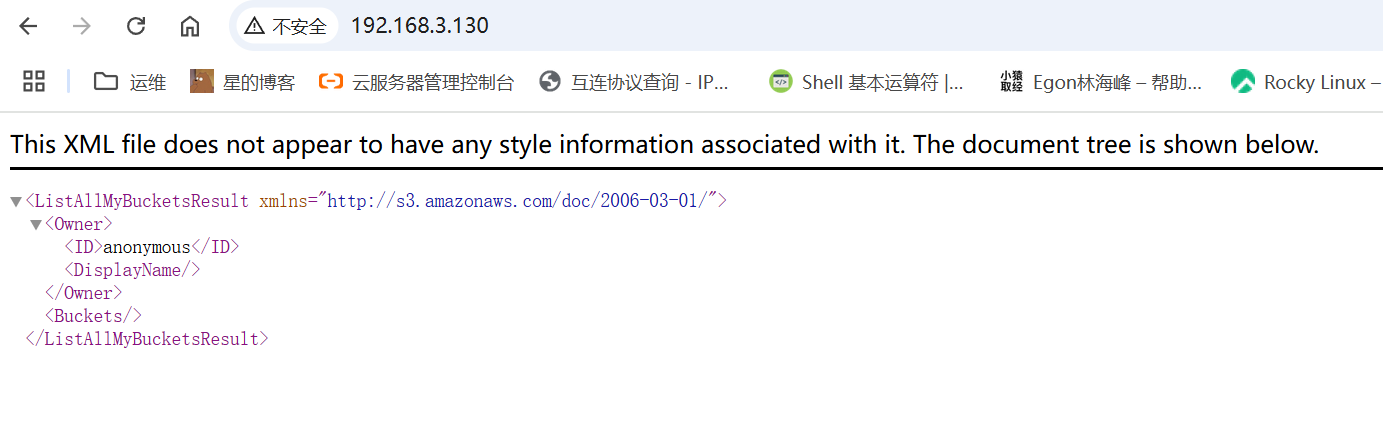
使用RGW(S3 API) 客户端安装与配置一、创建RGW用户#用于s3cmd客户端连接RGW 保存好user1用户的access_key、secret_key信息。 root@ubuntu01:~# radosgw-admin user create --uid="user1" --display-name="user1" { "user_id": "user1", "display_name": "user1", "email": "", "suspended": 0, "max_buckets": 1000, "subusers": [], "keys": [ { "user": "user1", "access_key": "OD3YSHLB5J11CGNIJLLO", "secret_key": "vIRD7vv8RXuxiJme41JJmmQn1r3hoS7BKXqrHiJQ" } ], "swift_keys": [], "caps": [], "op_mask": "read, write, delete", "default_placement": "", "default_storage_class": "", "placement_tags": [], "bucket_quota": { "enabled": false, "check_on_raw": false, "max_size": -1, "max_size_kb": 0, "max_objects": -1 }, "user_quota": { "enabled": false, "check_on_raw": false, "max_size": -1, "max_size_kb": 0, "max_objects": -1 }, "temp_url_keys": [], "type": "rgw", "mfa_ids": [] } #保存好user1用户的access_key、secret_key信息。二、安装s3cmd客户端root@ceph-client:~# s3cmd --configure --no-check-certificate # 进入配置模式并禁用证书验证 Enter new values or accept defaults in brackets with Enter. Refer to user manual for detailed description of all options. Access key and Secret key are your identifiers for Amazon S3. Leave them empty for using the env variables. Access Key: KKX8OPSFKL3RR3JQRO5D # 用户access key Secret Key: MDjM5KkaKEgWIdrvLr6fSsFmQsZlfuPNOFyBa3IB # 用户Secret Key Default Region [US]: CN # 地区,可选 Use "s3.amazonaws.com" for S3 Endpoint and not modify it to the target Amazon S3. S3 Endpoint [s3.amazonaws.com]: ceph-rgw.local.com # RGW域名 Use "%(bucket)s.s3.amazonaws.com" to the target Amazon S3. "%(bucket)s" and "%(location)s" vars can be used if the target S3 system supports dns based buckets. DNS-style bucket+hostname:port template for accessing a bucket [%(bucket)s.s3.amazonaws.com]: ceph-rgw.local.com/%(bucket) # bucket域名格式 Encryption password is used to protect your files from reading by unauthorized persons while in transfer to S3 Encryption password: 123.com # 密码 Path to GPG program [/usr/bin/gpg]: # gpg命令路径,用于认证管理,直接回车 When using secure HTTPS protocol all communication with Amazon S3 servers is protected from 3rd party eavesdropping. This method is slower than plain HTTP, and can only be proxied with Python 2.7 or newer Use HTTPS protocol [Yes]: Yes # 是否使用Https加密 On some networks all internet access must go through a HTTP proxy. Try setting it here if you can t connect to S3 directly HTTP Proxy server name: # 使用代理 # 生成配置内容 New settings: Access Key: KKX8OPSFKL3RR3JQRO5D Secret Key: MDjM5KkaKEgWIdrvLr6fSsFmQsZlfuPNOFyBa3IB Default Region: CN S3 Endpoint: ceph-rgw.local.com DNS-style bucket+hostname:port template for accessing a bucket: ceph-rgw.local.com/%(bucket) Encryption password: 123.com Path to GPG program: /usr/bin/gpg Use HTTPS protocol: True HTTP Proxy server name: HTTP Proxy server port: 0 # 测试连接 Test access with supplied credentials? [Y/n] y Please wait, attempting to list all buckets... Success. Your access key and secret key worked fine :-) Now verifying that encryption works... Success. Encryption and decryption worked fine :-) # 配置文件保存 Save settings? [y/N] y Configuration saved to '/root/.s3cfg's3cmd是一个通过命令行访问ceph RGW实现创建存储桶、上传、下载以及管理数据到对象存储的命令行工具。 root@k8s01:~/helm/traefik/traefik-helm-chart-35.4.0/traefik# s3cmd --configure --no-check-certificate Enter new values or accept defaults in brackets with Enter. Refer to user manual for detailed description of all options. Access key and Secret key are your identifiers for Amazon S3. Leave them empty for using the env variables. Access Key: ^C^C Configuration aborted. Changes were NOT saved. root@k8s01:~/helm/traefik/traefik-helm-chart-35.4.0/traefik# ^C root@k8s01:~/helm/traefik/traefik-helm-chart-35.4.0/traefik# s3cmd --configure --no-check-certificate Enter new values or accept defaults in brackets with Enter. Refer to user manual for detailed description of all options. Access key and Secret key are your identifiers for Amazon S3. Leave them empty for using the env variables. Access Key: OD3YSHLB5J11CGNIJLLO Secret Key: vIRD7vv8RXuxiJme41JJmmQn1r3hoS7BKXqrHiJQ Default Region [US]: CN Use "s3.amazonaws.com" for S3 Endpoint and not modify it to the target Amazon S3. S3 Endpoint [s3.amazonaws.com]: ceph-rgw.local.com Use "%(bucket)s.s3.amazonaws.com" to the target Amazon S3. "%(bucket)s" and "%(location)s" vars can be used if the target S3 system supports dns based buckets. DNS-style bucket+hostname:port template for accessing a bucket [%(bucket)s.s3.amazonaws.com]: ceph-rgw.local.com/%(bucket) Encryption password is used to protect your files from reading by unauthorized persons while in transfer to S3 Encryption password: 123.com Path to GPG program [/usr/bin/gpg]: When using secure HTTPS protocol all communication with Amazon S3 servers is protected from 3rd party eavesdropping. This method is slower than plain HTTP, and can only be proxied with Python 2.7 or newer Use HTTPS protocol [Yes]: yes On some networks all internet access must go through a HTTP proxy. Try setting it here if you can't connect to S3 directly HTTP Proxy server name: New settings: Access Key: OD3YSHLB5J11CGNIJLLO Secret Key: vIRD7vv8RXuxiJme41JJmmQn1r3hoS7BKXqrHiJQ Default Region: CN S3 Endpoint: ceph-rgw.local.com DNS-style bucket+hostname:port template for accessing a bucket: ceph-rgw.local.com/%(bucket) Encryption password: 123.com Path to GPG program: /usr/bin/gpg Use HTTPS protocol: True HTTP Proxy server name: HTTP Proxy server port: 0 Test access with supplied credentials? [Y/n] y Please wait, attempting to list all buckets... Success. Your access key and secret key worked fine :-) Now verifying that encryption works... Success. Encryption and decryption worked fine :-) Save settings? [y/N] y Configuration saved to '/root/.s3cfg'查看认证文件root@k8s01:~/helm/traefik/traefik-helm-chart-35.4.0/traefik# cat /root/.s3cfg [default] access_key = OD3YSHLB5J11CGNIJLLO access_token = add_encoding_exts = add_headers = bucket_location = CN ca_certs_file = cache_file = check_ssl_certificate = False check_ssl_hostname = True cloudfront_host = cloudfront.amazonaws.com connection_max_age = 5 connection_pooling = True content_disposition = content_type = default_mime_type = binary/octet-stream delay_updates = False delete_after = False delete_after_fetch = False delete_removed = False dry_run = False enable_multipart = True encoding = UTF-8 encrypt = False expiry_date = expiry_days = expiry_prefix = follow_symlinks = False force = False get_continue = False gpg_command = /usr/bin/gpg gpg_decrypt = %(gpg_command)s -d --verbose --no-use-agent --batch --yes --passphrase-fd %(passphrase_fd)s -o %(output_file)s %(input_file)s gpg_encrypt = %(gpg_command)s -c --verbose --no-use-agent --batch --yes --passphrase-fd %(passphrase_fd)s -o %(output_file)s %(input_file)s gpg_passphrase = 123.com guess_mime_type = True host_base = ceph-rgw.local.com host_bucket = ceph-rgw.local.com/%(bucket) human_readable_sizes = False invalidate_default_index_on_cf = False invalidate_default_index_root_on_cf = True invalidate_on_cf = False kms_key = limit = -1 limitrate = 0 list_md5 = False log_target_prefix = long_listing = False max_delete = -1 mime_type = multipart_chunk_size_mb = 15 multipart_copy_chunk_size_mb = 1024 multipart_max_chunks = 10000 preserve_attrs = True progress_meter = True proxy_host = proxy_port = 0 public_url_use_https = False put_continue = False recursive = False recv_chunk = 65536 reduced_redundancy = False requester_pays = False restore_days = 1 restore_priority = Standard secret_key = vIRD7vv8RXuxiJme41JJmmQn1r3hoS7BKXqrHiJQ send_chunk = 65536 server_side_encryption = False signature_v2 = False signurl_use_https = False simpledb_host = sdb.amazonaws.com skip_existing = False socket_timeout = 300 ssl_client_cert_file = ssl_client_key_file = stats = False stop_on_error = False storage_class = throttle_max = 100 upload_id = urlencoding_mode = normal use_http_expect = False use_https = True use_mime_magic = True verbosity = WARNING website_endpoint = http://%(bucket)s.s3-website-%(location)s.amazonaws.com/ website_error = website_index = index.html三、s3cmd常见使用命令 使用s3cmd --help查看帮助信息,详细使用方法见:http://s3tools.orgroot@ceph-client:~# s3cmd --help Usage: s3cmd [options] COMMAND [parameters]四、s3cmd 使用 4.1创建bucket存储空间Bucket是用于存储对象Object的容器,在上传任意类型的Object前,需要先创建Bucket,并指定区域 bucket/object授权参考:https://docs.amazonaws.cn/AmazonS3/latest/userguide/access-policy-language-overview.htmlroot@ceph-client:~# s3cmd mb s3://mybucket --region=default Bucket 's3://mybucket/' created root@ceph-client:~# s3cmd ls --region=default 2024-12-17 10:08 s3://mybucket4.2上传文件root@ceph-client:~# s3cmd put /var/log/syslog s3://mybucket upload: '/var/log/syslog' -> 's3://mybucket/syslog' [1 of 1] 1252189 of 1252189 100% in 2s 532.45 kB/s done4.3查看文件root@ceph-client:~# s3cmd ls s3://mybucket 2024-12-17 10:11 1252189 s3://mybucket/syslog4.4下载文件root@ceph-client:~# s3cmd get s3://mybucket/syslog /root/ download: 's3://mybucket/syslog' -> '/root/syslog' [1 of 1] 1252189 of 1252189 100% in 0s 74.33 MB/s done root@ceph-client:~# ls -lh total 1.2M drwx------ 3 root root 4.0K Oct 28 15:28 snap -rw-r--r-- 1 root root 1.2M Dec 17 10:11 syslog4.5删除文件root@ceph-client:~# s3cmd ls s3://mybucket/ 2024-12-17 10:11 1252189 s3://mybucket/syslog root@ceph-client:~# s3cmd rm s3://mybucket/syslog delete: 's3://mybucket/syslog' root@ceph-client:~# s3cmd ls s3://mybucket/4.6目录上传与下载上传整个目录 root@ceph-client:~# s3cmd put --recursive /etc/apt s3://mybucket/ upload: '/etc/apt/apt.conf.d/01-vendor-ubuntu' -> 's3://mybucket/apt/apt.conf.d/01-vendor-ubuntu' [1 of 24] 92 of 92 100% in 0s 9.30 kB/s done upload: '/etc/apt/apt.conf.d/01autoremove' -> 's3://mybucket/apt/apt.conf.d/01autoremove' [2 of 24] 630 of 630 100% in 0s 85.25 kB/s done upload: '/etc/apt/apt.conf.d/10periodic' -> 's3://mybucket/apt/apt.conf.d/10periodic' [3 of 24] 129 of 129 100% in 0s 19.73 kB/s done …… 查看验证 root@ceph-client:~# s3cmd ls s3://mybucket/apt/ DIR s3://mybucket/apt/apt.conf.d/ DIR s3://mybucket/apt/preferences.d/ DIR s3://mybucket/apt/sources.list.d/ DIR s3://mybucket/apt/trusted.gpg.d/ 2024-12-17 10:17 2883 s3://mybucket/apt/sources.list 2024-12-17 10:17 2743 s3://mybucket/apt/sources.list.curtin.old 2024-12-17 10:17 2717 s3://mybucket/apt/sources.list.save 2024-12-17 10:17 3939 s3://mybucket/apt/trusted.gpg 2024-12-17 10:17 2760 s3://mybucket/apt/trusted.gpg~ 下载整个目录 root@ceph-client:~# mkdir /tmp/apt root@ceph-client:~# s3cmd get --recursive s3://mybucket/apt/ /tmp/apt root@ceph-client:/var/tmp# s3cmd get --recursive s3://mybucket/apt/ /tmp/apt download: 's3://mybucket/apt/apt.conf.d/01-vendor-ubuntu' -> '/tmp/apt/apt.conf.d/01-vendor-ubuntu' [1 of 24] 92 of 92 100% in 0s 47.39 kB/s done download: 's3://mybucket/apt/apt.conf.d/01autoremove' -> '/tmp/apt/apt.conf.d/01autoremove' [2 of 24] 630 of 630 100% in 0s 200.08 kB/s done download: 's3://mybucket/apt/apt.conf.d/10periodic' -> '/tmp/apt/apt.conf.d/10periodic' [3 of 24] 129 of 129 100% in 0s 2.91 kB/s done download: 's3://mybucket/apt/apt.conf.d/15update-stamp' -> '/tmp/apt/apt.conf.d/15update-stamp' [4 of 24] 108 of 108 100% in 0s 35.32 kB/s done download: 's3://mybucket/apt/apt.conf.d/20apt-esm-hook.conf' -> '/tmp/apt/apt.conf.d/20apt-esm-hook.conf' [5 of 24] …… 查看验证 root@ceph-client:/tmp/apt# pwd /tmp/apt root@ceph-client:/tmp/apt# ls apt.conf.d sources.list sources.list.d trusted.gpg trusted.gpg.d preferences.d sources.list.curtin.old sources.list.save trusted.gpg~五、项目实践 5.1创建bucketroot@ceph-client:~# s3cmd mb s3://images --region=default Bucket 's3://images/' created5.2上传文件root@ceph-client:~# s3cmd put 2024_12_16_22_35_54_347-1734359754493.jpg s3://images upload: '2024_12_16_22_35_54_347-1734359754493.jpg' -> 's3://images/2024_12_16_22_35_54_347-1734359754493.jpg' [1 of 1] 502213 of 502213 100% in 0s 17.88 MB/s done5.3授权授权bucket匿名用户只读权限,用于浏览器访问 https://docs.amazonaws.cn/AmazonS3/latest/userguide/example-bucket-policies.html # 编辑授权文件,对images bucket用户授予读权限 root@ceph-client:~# cat > images-bucket-single-policy.json << EOF { "Version": "2012-10-17", "Statement": [{ "Effect": "Allow" , "Principal": "*", "Action": "s3:GetObject", "Resource": [ "arn:aws:s3:::images/*" ] }] } EOF # 执行授权 root@ceph-client:~# s3cmd setpolicy images-bucket-single-policy.json s3://images s3://images/: Policy updated5.4访问测试浏览器访问 vip:端口/bucket/name测试六、配置nginx反向代理 nginx服务器为192.168.10.95,实现访问www.cuiliangblog.cn 的图片内容将请求转向访问ceph 对象存储中的 image 资源root@ceph-client:~# cat /etc/nginx/conf.d/demo.conf server { listen 80; server_name www.cuiliangblog.cn; location / { root html; index index.html index.htm; } location ~* \.(jpg|png)$ { # 以jpg或png结尾的请求转向192.168.10.90(VIP) proxy_pass https://192.168.10.90; } }启动nginxsystemctl start nginx浏览器访问图片资源
-
RadosGW部署 一、创建 radosgw服务root@ubuntu01:~# ceph orch apply rgw default es --placement="count:3" Scheduled rgw.default update...<realm-name>:RadosGW 的域名,可以自定义,例如 default. <zone-name>:RadosGW 的区域名,可以自定义,例如 es. --placement="count:1":表示 RadosGW 实例的数量。如果你想在多个节点上部署,可以增加 count 的值,或者指定节点列表二、验证radosgw服务状态root@ubuntu01:~# ceph orch ps | grep rgw rgw.default.ubuntu01.lusoxe ubuntu01 *:80 starting - - - - <unknown> <unknown> known> rgw.default.ubuntu02.nvamia ubuntu02 *:80 starting - - - - <unknown> <unknown> known> rgw.default.ubuntu03.rkgoya ubuntu03 *:80 starting - - - - <unknown> <unknown> known> root@ubuntu01:~# ceph -s cluster: id: 5b0e9b94-e6bb-11ef-a18c-274714e73e14 health: HEALTH_WARN clock skew detected on mon.ubuntu03 1 pool(s) do not have an application enabled services: mon: 3 daemons, quorum ubuntu01,ubuntu02,ubuntu03 (age 8h) mgr: ubuntu02.jmaxlt(active, since 8h), standbys: ubuntu01.exrhij mds: 1/1 daemons up, 1 standby osd: 3 osds: 3 up (since 8h), 3 in (since 2w) rgw: 3 daemons active (3 hosts, 1 zones) data: volumes: 1/1 healthy pools: 10 pools, 181 pgs objects: 9.37k objects, 2.5 GiB usage: 8.5 GiB used, 111 GiB / 120 GiB avail pgs: 181 active+clean io: client: 214 KiB/s rd, 5.1 KiB/s wr, 247 op/s rd, 141 op/s wr三、验证 radosgw 存储池资源#查看存储池列表 root@ubuntu01:~# ceph osd pool ls .mgr kubernetes k8s-rbd k8s cephfs_data cephfs_metadata .rgw.root default.rgw.log default.rgw.control default.rgw.meta#查看默认radosgw存储池信息 root@ubuntu01:~# radosgw-admin zone get --rgw-zone=default --rgw-zonegroup=default { "id": "7f883cbd-8ada-48aa-9358-f2c09aee0ca7",# 区域的唯一标识符 "name": "default",# 默认区域的名称 "domain_root": "default.rgw.meta:root",# 区域的根域名 "control_pool": "default.rgw.control",# 系统控制池,在有数据更新是,通知其他RGW更新缓存 "gc_pool": "default.rgw.log:gc", # 用于垃圾回收的存储池 "lc_pool": "default.rgw.log:lc",# 用于存储日志的存储池 "log_pool": "default.rgw.log",# 存储日志信息,用于记录各种log信息 "intent_log_pool": "default.rgw.log:intent", "usage_log_pool": "default.rgw.log:usage", "roles_pool": "default.rgw.meta:roles",# default.rgw.meta:元数据存储池,通过不同的名称空间分别存储不同的rados对象 "reshard_pool": "default.rgw.log:reshard", "user_keys_pool": "default.rgw.meta:users.keys",# 用户的密钥名称空间users.keys "user_email_pool": "default.rgw.meta:users.email",# 用户的email名称空间users.email "user_swift_pool": "default.rgw.meta:users.swift",# 用户的subuser的名称空间users.swift "user_uid_pool": "default.rgw.meta:users.uid", # 用户UID "otp_pool": "default.rgw.otp", "system_key": { "access_key": "", "secret_key": "" }, "placement_pools": [ { "key": "default-placement", "val": { "index_pool": "default.rgw.buckets.index",# 存放bucket到object的索引信息 "storage_classes": { "STANDARD": { "data_pool": "default.rgw.buckets.data"# 存放对象的数据 } }, "data_extra_pool": "default.rgw.buckets.non-ec",# 数据的额外信息存储池 "index_type": 0, "inline_data": true } } ], "realm_id": "", "notif_pool": "default.rgw.log:notif" }#查看默认配置信息 root@ubuntu01:~# ceph osd pool get default.rgw.meta crush_rule crush_rule: replicated_rule root@ubuntu01:~# ceph osd pool get default.rgw.meta size size: 3 root@ubuntu01:~# ceph osd pool get default.rgw.meta pgp_num pgp_num: 16 root@ubuntu01:~# ceph osd pool get default.rgw.meta pg_num pg_num: 16四、访问radosgw服务访问radosgw服务所在的节点 IP+默认 80 端口既可。五、RadosGW https 5.1生成自签证书root@ubuntu01:/# mkdir -p /etc/ceph/rgw/cert root@ubuntu01:/# openssl req -newkey rsa:2048 -x509 -days 3650 -nodes -out /etc/ceph/rgw/cert/rgw-cert.pem -keyout /etc/ceph/rgw/cert/rgw-key.pem -subj "/CN=ceph-rgw.local.com" Generating a RSA private key ...............................+++++ ..................................+++++ writing new private key to '/etc/ceph/rgw/cert/rgw-key.pem' ----- root@ubuntu01:/# tree /etc/ceph/rgw/cert/ /etc/ceph/rgw/cert/ ├── rgw-cert.pem └── rgw-key.pem 0 directories, 2 files5.2创建配置文件#将公钥和私钥内容添加到配置文件中 rgw.yaml service_type: rgw service_id: default placement: hosts: - ubuntu01 - ubuntu02 - ubuntu03 spec: rgw_frontend_ssl_certificate: | -----BEGIN PRIVATE KEY----- MIIEvQIBADANBgkqhkiG9w0BAQEFAASCBKcwggSjAgEAAoIBAQC/q3zdOnRPSsRz OlP1Z0rBYJUn9VzZF+Rlnt7IN3q+6Ir/jCb6jtMYP1A+KiTcv8OaTdre4OxOjIFG iK1bZpEl16q+phKGbnfbphrptCVwpw7vV3n7Pjz57awXM728S7ql62JutIfrDWqN YY0EnMeO7xFrXdy4ow8d3GobhsfiTcU38nyWXZ5Qy7vd43kJElMxbbsXJrhPO43x 6gJCWdvIztdjewtFW2rqy8cDPaKxcXubYAOlJUzN53eAdGxC6Br6HWsyVn8VnsPI UQigwSzOx6DAa9QKjVIIi454pb3C+se1TD3el1JhZ5ZDav5g0Fp9zB1DetkR3vh7 3ixqwddRAgMBAAECggEADohJElkBQpXPqVDt1rh7MYhKJtpyrL8kARR3ncSfGOR2 zYNp3SuBE+CRC/WUD+y2PvfSNX3mTNpYXum0Ay8WqEDe4E+lLe4oRk4k0j1nbVAt ULZYOFVyuBxuJOA2bZVsVHIxZ2VmvMqqnoeb8pKUiuDTeEmIl7M9TS1OGkIw25aa VUU+kFLNwhVXQPAYu17dApl5GWI32gNcfZD7QF3fwNMz+u4h6dLCBiI+IQmXjtzX OCPs2exwfj9NaZ6jxZPQU1i2YoMRh2AuephP7hW+zeTUpgd4A6VHkX5ASKvs89U2 qel2639RLqdEg1bu7f5kHOlqYVmwuj6rw+EAyfxpQQKBgQDl81/euRc7NKj3uLoh yJqe/vQkvLKgKwVDAM6aKdI8/FhG1LNYbm5QJ83EuSmXSPm20bJjZWOjmQuIXSV2 V2UvmygHcQOeZsipJPgc2Yza6b3MDCKbBq/Kb4YrTtVLogjgKbbJXg99sSPKgJFG B4g4OGs8H2inkE3tKOn4CXUF2QKBgQDVYfXnMuGcZ8LfBiD1zfX1WGt8jKsoDI2/ LGGwQa/0Lo7xgqrN47hOFKMDGWglJPT06G2JR3gsPIvJlZNo5m6tYoLtZ0vEERlK +YzTVmTA/ThGAK7rePQv7GOGWubF6WYA8Bdyfqnm0yv8QtptcXq4bzyLEGMTKh4a mNOBw0eaOQKBgQDh4IczyKzBQ6EWdSahOORpehdoXtM38gphHtHTLXGO5nHwYc8p 9o/1vKOrshbgvJZOtv18FYQil5t0f8rkzERg1xAi/yiG2IATZnUyIaDzCNefL+xu S8syFwq8T9vFR41gZJlghDzDQtXdfR02pP9x+jmb/V5X+rARXjc1plSFQQKBgAvG 0UyGSV9Zdq7aZr1KNbXpwFzqYpPeRYB0kZuptG1UmH0JyiV82PIuP2TvZQkPxhky LsFx2VcPrGNexvj2JsuY8ULq/Yp/qxaxOS18yijAkPeEGCNU1J1EfaWvpKbtn7yT g6fFB9l+dCIDCo0Zwz0knoHKUL2BCJJNNvclcPE5AoGAXCuMEjSk54OUXoKj355l NbbpnrGofy7Pmi9H7dKxgKiN7wonjhV9Rztrbsms9lD4Ab/B1CrIRz6Hp5si+bw/ mDDboXmgEbNGMccxknye2p4S34R6RoERbNlXvor3Z46aWMP9Suqwa11WdklXQiaW wLC0RkGadfimQSxSGuFaJDE= -----END PRIVATE KEY----- -----BEGIN CERTIFICATE----- MIIDGzCCAgOgAwIBAgIUYkIzcxcGB4FBt1qTLXE9tOKNeMUwDQYJKoZIhvcNAQEL BQAwHTEbMBkGA1UEAwwSY2VwaC1yZ3cubG9jYWwuY29tMB4XDTI1MDYxNDE5MTEy MloXDTM1MDYxMjE5MTEyMlowHTEbMBkGA1UEAwwSY2VwaC1yZ3cubG9jYWwuY29t MIIBIjANBgkqhkiG9w0BAQEFAAOCAQ8AMIIBCgKCAQEAv6t83Tp0T0rEczpT9WdK wWCVJ/Vc2RfkZZ7eyDd6vuiK/4wm+o7TGD9QPiok3L/Dmk3a3uDsToyBRoitW2aR JdeqvqYShm5326Ya6bQlcKcO71d5+z48+e2sFzO9vEu6petibrSH6w1qjWGNBJzH ju8Ra13cuKMPHdxqG4bH4k3FN/J8ll2eUMu73eN5CRJTMW27Fya4TzuN8eoCQlnb yM7XY3sLRVtq6svHAz2isXF7m2ADpSVMzed3gHRsQuga+h1rMlZ/FZ7DyFEIoMEs zsegwGvUCo1SCIuOeKW9wvrHtUw93pdSYWeWQ2r+YNBafcwdQ3rZEd74e94sasHX UQIDAQABo1MwUTAdBgNVHQ4EFgQUbL6TyHoVR1jUBE+mT0ETcvJNwq0wHwYDVR0j BBgwFoAUbL6TyHoVR1jUBE+mT0ETcvJNwq0wDwYDVR0TAQH/BAUwAwEB/zANBgkq hkiG9w0BAQsFAAOCAQEAZ/8toy7FIUG4uq+SxP4dxcC/P/njpCklzoA5BGc8aEQ+ M+g/0eTR60ib6HWXp2PtezQ5fK1mZLImSeuHCcdAXddEq0opXaS3wEMs8N27fDLU jMjilBhzDlp7YnxZ64YzF3HzP2qHbDwoJjz/MqFSovkFEb4m8RYZNl6t/5U8XSmx vxWdypbmmd+Zr07BQ1l1ldeGi0CD9gxSYK3exF6Gdr7G/J7vC8Up0xHKnaZSqKOH vP8e/WL7T+p0s0ypjAIR29M1E9XfULt8xNQc3KtiEcvAZbxE3HWG7vnp93S/42vA errp5uKlZdaOaA1OD0/nmrP36hz6RnuUqIF88p7NnQ== -----END CERTIFICATE----- ssl: true rgw_frontend_port: 4435.3更新RGW配置root@ubuntu01:~# ceph orch apply -i rgw.yaml Scheduled rgw.default update... root@ubuntu01:~# ceph orch ps | grep rgw rgw.default.ubuntu01.lusoxe ubuntu01 *:80 running (31m) 12s ago 31m 101M - 18.2.4 2bc0b0f4375d 510eb15ca011 rgw.default.ubuntu02.abhedc ubuntu02 *:443 starting - - - - <unknown> <unknown> <unknown> rgw.default.ubuntu02.nvamia ubuntu02 *:80 running (31m) 13s ago 31m 106M - 18.2.4 2bc0b0f4375d 4a733c6c4488 rgw.default.ubuntu03.pvvalj ubuntu03 *:443 starting - - - - <unknown> <unknown> <unknown> rgw.default.ubuntu03.rkgoya ubuntu03 *:80 running (31m) 13s ago 31m 101M - 18.2.4 2bc0b0f4375d d341d13d6bac 5.4验证访问在本地host添加域名解析六、RadosGW 高可用 6.1自定义https 端口与副本数#修改默认端口并指定运行在 ceph1 和 ceph2 节点 root@ceph-1:/etc/ceph/rgw# cat > rgw.yaml << EOF service_type: rgw service_id: default placement: hosts: - ceph-1 - ceph-2 - ceph-3 spec: rgw_frontend_ssl_certificate: | -----BEGIN PRIVATE KEY----- MIIEvQIBADANBgkqhkiG9w0BAQEFAASCBKcwggSjAgEAAoIBAQC8EYtfCItzKsoy zh9AeiYMuJAebFaBkEpF00AYGvnviwOBUx8f4CjStnXAUtNq7nFrhTldai1B+pdL eZomzgfFTO6oN0tz6KBXEDJG+yoMqrce0RlGJH6i5ML1znWmWsVynU1xrqGC2D1J jIERsoyx+1vIuYHR8EBpKf7ldLYDqZ79bAEEj1ayzzPOIS4X3g9AAWo3EMCLRzCU ZY1GIfqXuPi2xMJKYfovXM1agU178qCqNlGFrjtAHOSYpmMssGM638Jh8ExaJxBU 4UvKcxc54Efypancj6ZffgEx07A6tVFk4zQrFp+2vbYTkcs3tF5KrRBvN1ExDqsb fofCTI+7AgMBAAECggEAaiYE4giynLgkE/TfEsdevoNVZLaFRO+p3CtV28UuGJP/ 0HiX8qfUosm1QG3/QjV+8s7pB96r2LeVuVXTOd/D5wp7EZrUDYHZLgrINeQBYdDh NpWSjFKA33P6zj5PjStikkRSt713D6D5Ro/1MYXzf2l97pc1vMa7tB+t7Nio+vtE PCzTsRZynbNCY3UoIKfQlbA/fMqyayU05GAJyJT0kHl8M1H5PD5czJjUqztKQEv0 aJGmXN77drBC/qznGfpTPaAi1l6Gh7eBBj8/7yWXDSyI3n7SSAz0e4eDjZRhBZrH hi2f6+xwpuTuOehUw0xo2rtJxl3o9qzNjwN05A8yoQKBgQDdOzuiAZtqBd7ERXZp sYev17tLuLpiCHQ5a5ljh4jVrP1/bh3mNiTnFMk3TwJLIwBPlo2Ugbd/vsl+Db3+ EKDFTC2md5CaH04/1QSmFFjsHfN1ZoLdmedVntlR4Hzah44jNdWvHl0WYRjzfxcM I782oawPYm73J7oGboiEfgtW8wKBgQDZoBNxcvjFZ+0LO5ms+ymWKwTnPpwGhW3M D0DcPcF08GSnmyHvZoB51FG4GEIjMkWRpOX+pg2fxNjO0Y5QxS5vBg0A5KztDg4r Kdy+McCZIWjCeF9O0mvhIXOKLFdUMrfp+s6GqJCIoht8QkxUuMn0TM3eq3p/WWts xVCs/tMmGQKBgBSyPOLsCZECmZN8+BXtMMdnhDMSRgVzywOwKDpibI+ozlJEh/GI cS1ZCXXuI0XKMXZAnGAfPn5p58muGW8SOSgb901SdCmm8hgQoo2y65qzNppuC6IV ism8wZHiUWvUMJzkpWfrjEPSs5Xb9tkA4xuGRmVuDPl8Mu/1GTpj3EW3AoGBAMJI 0pLZ3ZX+7fS1RMDViY7y4PHBR3Ha9ObUR0dYKrnHU1T+fhFIJTKehkYgAguB+fHI kTwB6u/TwOsC0lbxcj7T3BAMFwWbIrMOMG/r4tHSrb/PzuaDnKPkRU35wAz/KonM y0wUeNRCRN9uIM8SGdnsJ26/ECFZJzp3/Uo0RTUhAoGAG8X00lkMTiVHuAZmP7PO 4lYfUQA8PZ6i/7A/SnHuwWI0MyWKLw3T/4mCdHyw9YwPshdVWCddY59L1GKxdzI5 V87lNmdkH7l6jDm7IwY5KX0voZ8uLB1zQ9lIakQxPTj5ydO2lPsJGE8784suwAhY Y7UxYWWOAl7Pu0TfGXZjg+I= -----END PRIVATE KEY----- -----BEGIN CERTIFICATE----- MIIDGzCCAgOgAwIBAgIUN4U/CuGb78PO+vzw370d0hz1aBUwDQYJKoZIhvcNAQEL BQAwHTEbMBkGA1UEAwwSY2VwaC1yZ3cubG9jYWwuY29tMB4XDTI0MTIxNzA3MDAz M1oXDTM0MTIxNTA3MDAzM1owHTEbMBkGA1UEAwwSY2VwaC1yZ3cubG9jYWwuY29t MIIBIjANBgkqhkiG9w0BAQEFAAOCAQ8AMIIBCgKCAQEAvBGLXwiLcyrKMs4fQHom DLiQHmxWgZBKRdNAGBr574sDgVMfH+Ao0rZ1wFLTau5xa4U5XWotQfqXS3maJs4H xUzuqDdLc+igVxAyRvsqDKq3HtEZRiR+ouTC9c51plrFcp1Nca6hgtg9SYyBEbKM sftbyLmB0fBAaSn+5XS2A6me/WwBBI9Wss8zziEuF94PQAFqNxDAi0cwlGWNRiH6 l7j4tsTCSmH6L1zNWoFNe/KgqjZRha47QBzkmKZjLLBjOt/CYfBMWicQVOFLynMX OeBH8qWp3I+mX34BMdOwOrVRZOM0Kxaftr22E5HLN7ReSq0QbzdRMQ6rG36HwkyP uwIDAQABo1MwUTAdBgNVHQ4EFgQUUxgqlKlO+Pmvr+1QYv0bzf8BY4wwHwYDVR0j BBgwFoAUUxgqlKlO+Pmvr+1QYv0bzf8BY4wwDwYDVR0TAQH/BAUwAwEB/zANBgkq hkiG9w0BAQsFAAOCAQEAJf0D5Wy3BS9fUWqqgxLgvUSuK9EzfVHyyBeAzW+AYzus Iqv3KscFnJFkl8U7tfy0E/03z6LzA91Ok/6IvlsQA9w5agJF++nqNSatVbEin4Fr h4hu1HFMDFLkaQeGLcaHBgmMWOgK0DonitYEJZMbHBBYY5W7IzoZfduaOsJaXVoG rYCsoYlH2JHwIu3hXelzCLPfZhdBpvcgWIsQCnVy2n4y2WLRif0R+zPPZ4ZIz0qT en7C+vmvtP9SrpI9eIPUC3VAcTKxftvzyOHqBIB0+BzDa8lk0b4MMmaJkzt7Uq1k EJmfIFBAfER1wHb2vVPKd5/zi3h55T3D366M8yLx9Q== -----END CERTIFICATE----- ssl: true rgw_frontend_port: 8443 EOF root@ceph-1:/etc/ceph/rgw# ceph orch apply -i rgw.yaml Scheduled rgw.default update... root@ceph-1:/etc/ceph/rgw# ceph orch ps | grep rgw rgw.default.ceph-1.rsdmtv ceph-1 *:9443 running (29s) 23s ago 29s 87.6M - 18.2.4 2bc0b0f4375d c4d059ef4eeb rgw.default.ceph-2.hyhuzv ceph-2 *:9443 running (29s) 13s ago 29s 88.8M - 18.2.4 2bc0b0f4375d ff7f86383ba1 rgw.default.ceph-3.wnnkpd ceph-3 *:9443 running (30s) 24s ago 30s 88.4M - 18.2.4 2bc0b0f4375d 3d198beac816 6.2HaProxy部署以下操作在 ceph1、2、3 机器执行安装haproxy root@ceph-1:~# apt install haproxy -y#修改配置文件 root@ceph-1:~# cat > /etc/haproxy/haproxy.cfg << EOF # 开启管理员监控页面 listen admin_stats bind *:8888 # 监听的IP和端口号 mode http # 开启HTTP模式,stats功能需要 stats enable stats refresh 30s # 统计页面自动刷新时间 stats uri /admin # 访问的uri ip:8888/admin stats realm haproxy stats auth admin:admin # 认证用户名和密码 stats hide-version # 隐藏HAProxy的版本号 stats admin if TRUE # 管理界面,如果认证成功了,可通过webui管理节点 timeout client 5s # 客户端超时 timeout connect 3s # 连接超时 timeout server 5s # 后端服务器超时 # 配置前端监听 frontend main # 监听地址 bind *:443 # 匹配后端服务 default_backend rgw # 客户端超时 timeout client 5s # 配置后端代理 backend rgw # 连接超时 timeout connect 3s # 后端服务器超时 timeout server 5s server rgw1 192.168.10.91:9443 check server rgw2 192.168.10.92:9443 check server rgw3 192.168.10.93:9443 check EOF6.3启动服务root@ceph-1:~# systemctl start haproxy root@ceph-1:~# systemctl enable haproxy Synchronizing state of haproxy.service with SysV service script with /lib/systemd/systemd-sysv-install. Executing: /lib/systemd/systemd-sysv-install enable haproxy root@ceph-1:~# ss -tunlp | grep haproxy tcp LISTEN 0 4096 0.0.0.0:443 0.0.0.0:* users:(("haproxy",pid=61839,fd=7)) tcp LISTEN 0 4096 0.0.0.0:8888 0.0.0.0:* users:(("haproxy",pid=61839,fd=6))确认无误后 ceph-2 和 ceph-3 服务器同样的步骤配置。七、KeepAlived部署 以下操作在ceph-1、2、3 机器执行,设备网卡名称为ens33,VIP为192.168.10.90。 安装软件包root@ceph-1:~# apt install keepalived -y新增haproxy检测脚本root@ceph-1:~# vim /etc/keepalived/check_port.sh #!/bin/bash # 检查指定端口是否正常 PORT=443 if netstat -tuln | grep -q ":${PORT}\b"; then echo "${PORT}端口正常: 服务正在监听" exit 0 else echo "${PORT}端口异常: 未发现监听服务" exit 1 fi root@ceph-1:~# chmod u+x /etc/keepalived/check_port.sh修改配置文件root@ceph-1:/etc/keepalived# cat > /etc/keepalived/keepalived.conf << EOF global_defs { script_user root enable_script_security } vrrp_script chk_port { script "/etc/keepalived/check_port.sh" # 自定义检测脚本路径 interval 1 # 检测间隔,单位为秒 weight -2 # 如果检测失败,权重降低2 } vrrp_instance VI_1 { state MASTER # 设置为master节点 interface ens33 # 物理网卡名称 virtual_router_id 51 # 虚拟路由ID,主备保持一致 priority 100 # 优先级,主大于备 advert_int 1 # 关播间隔 authentication { # 认证信息,主备一致 auth_type PASS auth_pass 1111 } virtual_ipaddress { 192.168.10.90/24 # 虚拟IP信息 } track_script { chk_port # 引用上面定义的脚本 } } EOF启动服务root@ceph-1:/etc/keepalived# systemctl start keepalived.service root@ceph-1:/etc/keepalived# systemctl enable keepalived.service Synchronizing state of keepalived.service with SysV service script with /lib/systemd/systemd-sysv-install. Executing: /lib/systemd/systemd-sysv-install enable keepalived root@ceph-1:/etc/keepalived# ip a | grep 192.168.10.90 inet 192.168.10.90/24 scope global secondary ens33此时可以看到vip 192.168.10.90绑定到了 ceph-1服务器ens33 网卡上。同样的操作配置 ceph-2服务器,配置文件如下:global_defs { script_user root enable_script_security } vrrp_script chk_port { script "/etc/keepalived/check.sh" interval 2 weight -2 } vrrp_instance VI_1 { state BACKUP # 主备类型 interface ens33 virtual_router_id 51 priority 99 # 优先级低于主 advert_int 1 authentication { auth_type PASS auth_pass 1111 } virtual_ipaddress { 192.168.10.90/24 } track_script { chk_port # 引用上面定义的脚本 } }ceph-3 配置如下global_defs { script_user root enable_script_security } vrrp_script chk_port { script "/etc/keepalived/check.sh" interval 2 weight -2 } vrrp_instance VI_1 { state BACKUP # 主备类型 interface ens33 virtual_router_id 51 priority 98 # 优先级低于主 advert_int 1 authentication { auth_type PASS auth_pass 1111 } virtual_ipaddress { 192.168.10.90/24 } track_script { chk_port # 引用上面定义的脚本 } }八、高可用测试 接下来停止 ceph-1服务,模拟异常故障,查看 ceph-2服务器,vip已经成功飘移过来root@ceph-1:~# systemctl stop haproxy.service root@ceph-2:~# ip a | grep 192.168.10.90 inet 192.168.10.90/24 scope global secondary ens33访问vip的 443 端口,可正常提供服务
-
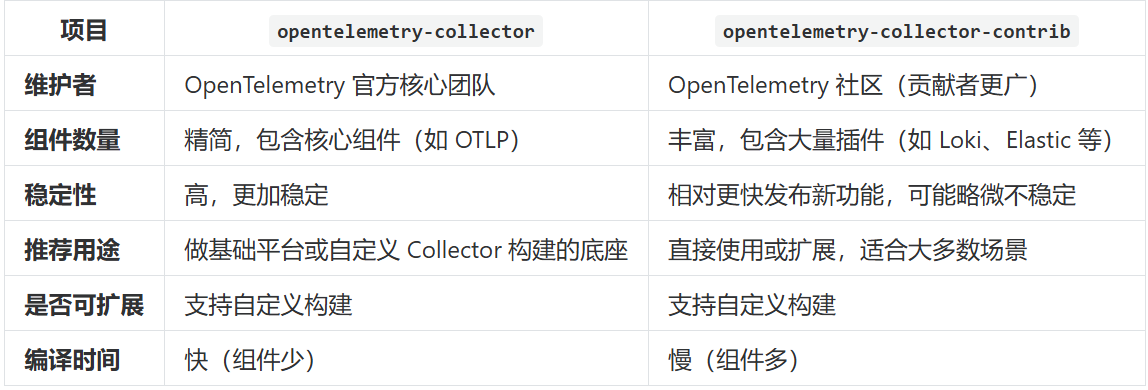
OpenTelemetry数据收集 一、收集器配置详解OpenTelemetry 的 Collector 组件是实现观测数据(Trace、Metrics、Logs)收集、处理和导出的一站式服务。它的配置主要分为以下 四大核心模块: receivers(接收数据) processors(数据处理) exporters(导出数据) service(工作流程)1、配置格式#具体配置项可参考文档https://opentelemetry.io/docs/collector/configuration/ apiVersion: opentelemetry.io/v1beta1 kind: OpenTelemetryCollector # 定义资源类型为 OpenTelemetryCollector metadata: name: sidecar # Collector 的名称 spec: mode: sidecar # 以 sidecar 模式运行(与应用容器同 Pod) config: # Collector 配置部分(结构化 YAML) receivers: # 数据接收器(如 otlp、prometheus) processors: # 数据处理器(如 batch、resource、attributes) exporters: # 数据导出器(如 otlp、logging、jaeger、prometheus) service: # 服务配置(定义哪些 pipeline 生效) pipelines: traces: # trace 数据的处理流程 metrics: # metric 数据的处理流程 logs: # log 数据的处理流程2、Receivers(接收器)用于接收数据。支持的类型有很多, otlp:接收 otlp 协议的数据内容 receivers: otlp: protocols: grpc: # 高性能、推荐使用 endpoint: 0.0.0.0:4317 http: # 浏览器或无 gRPC 支持的环境 endpoint: 0.0.0.0:4318prometheus: 用于采集 /metrics 接口的数据。 receivers: prometheus: config: scrape_configs: - job_name: my-service static_configs: - targets: ['my-app:8080']filelog: 从文件读取日志 receivers: filelog: include: [ /var/log/myapp/*.log ] start_at: beginning operators: - type: json_parser parse_from: body timestamp: parse_from: attributes.time3、Processors(处理器)用于在导出前对数据进行修改、增强或过滤。常用的包括: batch : 将数据批处理后导出,提高吞吐量。 processors: batch: timeout: 10s send_batch_size: 1024resource : 为 trace/metric/log 添加统一标签。 processors: resource: attributes: - key: service.namespace value: demo action: insertattributes : 添加、修改或删除属性 processors: attributes: actions: - key: http.method value: GET action: insert处理器配置可参考文档:https://github.com/open-telemetry/opentelemetry-collector-contrib/tree/main/processor4、Exporters(导出器)用于将数据导出到后端系统 otlp: 用于将数据发送到另一个 OTEL Collector、Jaeger、Tempo、Datadog 等。 exporters: otlp: endpoint: tempo-collector:4317 tls: insecure: truePrometheus: 用于暴露一个 /metrics HTTP 端口给 Prometheus 拉取。 exporters: prometheus: endpoint: "0.0.0.0:8889"logging : 调试用,打印数据到控制台。 exporters: debug: loglevel: debug5、Service(工作流程)service.pipelines 是一个“调度图”,告诉 OpenTelemetry Collector,对于某种类型的数据,比如 trace,请用哪个 receiver 来接收,用哪些 processor 来处理,最终送到哪些 exporter 去导出。service: pipelines: traces: receivers: [otlp] processors: [batch, resource] exporters: [otlp, logging] metrics: receivers: [prometheus] processors: [batch] exporters: [prometheus] logs: receivers: [filelog] processors: [batch] exporters: [otlp]二、Collector 发行版本区别opentelemetry-collector 和 opentelemetry-collector-contrib 是两个 OpenTelemetry Collector 的发行版本,它们的区别主要在于 内置组件的丰富程度 和 维护主体。
-
OpenTelemetry 应用埋点 一、部署示例应用 1、部署java应用apiVersion: apps/v1 kind: Deployment metadata: name: java-demo spec: selector: matchLabels: app: java-demo template: metadata: labels: app: java-demo spec: containers: - name: java-demo image: registry.cn-guangzhou.aliyuncs.com/xingcangku/spring-petclinic:1.5.1 imagePullPolicy: IfNotPresent resources: limits: memory: "1Gi" # 增加内存 cpu: "500m" ports: - containerPort: 8080 --- apiVersion: v1 kind: Service metadata: name: java-demo spec: type: ClusterIP # 改为 ClusterIP,Traefik 使用服务发现 selector: app: java-demo ports: - port: 80 targetPort: 8080 --- apiVersion: traefik.io/v1alpha1 kind: IngressRoute metadata: name: java-demo spec: entryPoints: - web # 使用 WEB 入口点 (端口 8000) routes: - match: Host(`java-demo.local.cn`) # 可以修改为您需要的域名 kind: Rule services: - name: java-demo port: 80 2、部署python应用apiVersion: apps/v1 kind: Deployment metadata: name: python-demo spec: selector: matchLabels: app: python-demo template: metadata: labels: app: python-demo spec: containers: - name: python-demo image: registry.cn-guangzhou.aliyuncs.com/xingcangku/python-demoapp:latest imagePullPolicy: IfNotPresent resources: limits: memory: "500Mi" cpu: "200m" ports: - containerPort: 5000 --- apiVersion: v1 kind: Service metadata: name: python-demo spec: selector: app: python-demo ports: - port: 5000 targetPort: 5000 --- apiVersion: traefik.io/v1alpha1 kind: IngressRoute metadata: name: python-demo spec: entryPoints: - web routes: - match: Host(`python-demo.local.com`) kind: Rule services: - name: python-demo port: 5000二、应用埋点 1、java应用自动埋点apiVersion: opentelemetry.io/v1alpha1 kind: Instrumentation # 声明资源类型为 Instrumentation(用于语言自动注入) metadata: name: java-instrumentation # Instrumentation 资源的名称(可以被 Deployment 等引用) namespace: opentelemetry spec: propagators: # 指定用于 trace 上下文传播的方式,支持多种格式 - tracecontext # W3C Trace Context(最通用的跨服务追踪格式) - baggage # 传播用户定义的上下文键值对 - b3 # Zipkin 的 B3 header(用于兼容 Zipkin 环境) sampler: # 定义采样策略(决定是否收集 trace) type: always_on # 始终采样所有请求(适合测试或调试环境) java: # image: ghcr.io/open-telemetry/opentelemetry-operator/autoinstrumentation-java:latest # 使用的 Java 自动注入 agent 镜像地址 image: harbor.cuiliangblog.cn/otel/autoinstrumentation-java:latest env: - name: OTEL_EXPORTER_OTLP_ENDPOINT value: http://center-collector.opentelemetry.svc:4318#为了启用自动检测,我们需要更新部署文件并向其添加注解。这样我们可以告诉 OpenTelemetry Operator 将 sidecar 和 java-instrumentation 注入到我们的应用程序中。修改 Deployment 配置如下: apiVersion: apps/v1 kind: Deployment metadata: name: java-demo spec: selector: matchLabels: app: java-demo template: metadata: labels: app: java-demo annotations: instrumentation.opentelemetry.io/inject-java: "opentelemetry/java-instrumentation" # 填写 Instrumentation 资源的名称 sidecar.opentelemetry.io/inject: "opentelemetry/sidecar" # 注入一个 sidecar 模式的 OpenTelemetry Collector spec: containers: - name: java-demo image: registry.cn-guangzhou.aliyuncs.com/xingcangku/spring-petclinic:1.5.1 imagePullPolicy: IfNotPresent resources: limits: memory: "500Mi" cpu: "200m" ports: - containerPort: 8080#接下来更新 deployment,然后查看资源信息,java-demo 容器已经变为两个。 root@k8s01:~/helm/opentelemetry# kubectl get pods NAME READY STATUS RESTARTS AGE java-demo-5cdd74d47-vmqqx 0/2 Init:0/1 0 6s java-demo-5f4d989b88-xrzg7 1/1 Running 0 42m my-sonarqube-postgresql-0 1/1 Running 8 (2d21h ago) 9d my-sonarqube-sonarqube-0 0/1 Pending 0 6d6h python-demo-69c56c549c-jcgmj 1/1 Running 0 16m redis-5ff4857944-v2vz5 1/1 Running 5 (2d21h ago) 6d2h root@k8s01:~/helm/opentelemetry# kubectl get pods -w NAME READY STATUS RESTARTS AGE java-demo-5cdd74d47-vmqqx 0/2 PodInitializing 0 9s java-demo-5f4d989b88-xrzg7 1/1 Running 0 42m my-sonarqube-postgresql-0 1/1 Running 8 (2d21h ago) 9d my-sonarqube-sonarqube-0 0/1 Pending 0 6d6h python-demo-69c56c549c-jcgmj 1/1 Running 0 17m redis-5ff4857944-v2vz5 1/1 Running 5 (2d21h ago) 6d2h java-demo-5cdd74d47-vmqqx 2/2 Running 0 23s java-demo-5f4d989b88-xrzg7 1/1 Terminating 0 43m java-demo-5f4d989b88-xrzg7 0/1 Terminating 0 43m java-demo-5f4d989b88-xrzg7 0/1 Terminating 0 43m java-demo-5f4d989b88-xrzg7 0/1 Terminating 0 43m java-demo-5f4d989b88-xrzg7 0/1 Terminating 0 43m root@k8s01:~/helm/opentelemetry# kubectl get pods -w NAME READY STATUS RESTARTS AGE java-demo-5cdd74d47-vmqqx 2/2 Running 0 28s my-sonarqube-postgresql-0 1/1 Running 8 (2d21h ago) 9d my-sonarqube-sonarqube-0 0/1 Pending 0 6d6h python-demo-69c56c549c-jcgmj 1/1 Running 0 17m redis-5ff4857944-v2vz5 1/1 Running 5 (2d21h ago) 6d2h ^Croot@k8s01:~/helm/opentelemetry# kubectl get opentelemetrycollectors -A NAMESPACE NAME MODE VERSION READY AGE IMAGE MANAGEMENT opentelemetry center deployment 0.127.0 1/1 3h22m registry.cn-guangzhou.aliyuncs.com/xingcangku/opentelemetry-collector-0.127.0:0.127.0 managed opentelemetry sidecar sidecar 0.127.0 3h19m managed root@k8s01:~/helm/opentelemetry# kubectl get instrumentations -A NAMESPACE NAME AGE ENDPOINT SAMPLER SAMPLER ARG opentelemetry java-instrumentation 2m26s always_on #查看 sidecar日志,已正常启动并发送 spans 数据 root@k8s01:~/helm/opentelemetry# kubectl logs java-demo-5cdd74d47-vmqqx -c otc-container 2025-06-14T15:31:35.013Z info service@v0.127.0/service.go:199 Setting up own telemetry... {"resource": {}} 2025-06-14T15:31:35.014Z debug builders/builders.go:24 Stable component. {"resource": {}, "otelcol.component.id": "otlp", "otelcol.component.kind": "exporter", "otelcol.signal": "traces"} 2025-06-14T15:31:35.014Z info builders/builders.go:26 Development component. May change in the future. {"resource": {}, "otelcol.component.id": "debug", "otelcol.component.kind": "exporter", "otelcol.signal": "traces"} 2025-06-14T15:31:35.014Z debug builders/builders.go:24 Beta component. May change in the future. {"resource": {}, "otelcol.component.id": "batch", "otelcol.component.kind": "processor", "otelcol.pipeline.id": "traces", "otelcol.signal": "traces"} 2025-06-14T15:31:35.014Z debug builders/builders.go:24 Stable component. {"resource": {}, "otelcol.component.id": "otlp", "otelcol.component.kind": "receiver", "otelcol.signal": "traces"} 2025-06-14T15:31:35.014Z debug otlpreceiver@v0.127.0/otlp.go:58 created signal-agnostic logger {"resource": {}, "otelcol.component.id": "otlp", "otelcol.component.kind": "receiver"} 2025-06-14T15:31:35.021Z info service@v0.127.0/service.go:266 Starting otelcol... {"resource": {}, "Version": "0.127.0", "NumCPU": 8} 2025-06-14T15:31:35.021Z info extensions/extensions.go:41 Starting extensions... {"resource": {}} 2025-06-14T15:31:35.021Z info grpc@v1.72.1/clientconn.go:176 [core] original dial target is: "center-collector.opentelemetry.svc:4317" {"resource": {}, "grpc_log": true} 2025-06-14T15:31:35.021Z info grpc@v1.72.1/clientconn.go:459 [core] [Channel #1]Channel created {"resource": {}, "grpc_log": true} 2025-06-14T15:31:35.021Z info grpc@v1.72.1/clientconn.go:207 [core] [Channel #1]parsed dial target is: resolver.Target{URL:url.URL{Scheme:"passthrough", Opaque:"", User:(*url.Userinfo)(nil), Host:"", Path:"/center-collector.opentelemetry.svc:4317", RawPath:"", OmitHost:false, ForceQuery:false, RawQuery:"", Fragment:"", RawFragment:""}} {"resource": {}, "grpc_log": true} 2025-06-14T15:31:35.021Z info grpc@v1.72.1/clientconn.go:208 [core] [Channel #1]Channel authority set to "center-collector.opentelemetry.svc:4317" {"resource": {}, "grpc_log": true} 2025-06-14T15:31:35.022Z info grpc@v1.72.1/resolver_wrapper.go:210 [core] [Channel #1]Resolver state updated: { "Addresses": [ { "Addr": "center-collector.opentelemetry.svc:4317", "ServerName": "", "Attributes": null, "BalancerAttributes": null, "Metadata": null } ], "Endpoints": [ { "Addresses": [ { "Addr": "center-collector.opentelemetry.svc:4317", "ServerName": "", "Attributes": null, "BalancerAttributes": null, "Metadata": null } ], "Attributes": null } ], "ServiceConfig": null, "Attributes": null } (resolver returned new addresses) {"resource": {}, "grpc_log": true} 2025-06-14T15:31:35.022Z info grpc@v1.72.1/balancer_wrapper.go:122 [core] [Channel #1]Channel switches to new LB policy "pick_first" {"resource": {}, "grpc_log": true} 2025-06-14T15:31:35.023Z info gracefulswitch/gracefulswitch.go:194 [pick-first-leaf-lb] [pick-first-leaf-lb 0xc000bc6090] Received new config { "shuffleAddressList": false }, resolver state { "Addresses": [ { "Addr": "center-collector.opentelemetry.svc:4317", "ServerName": "", "Attributes": null, "BalancerAttributes": null, "Metadata": null } ], "Endpoints": [ { "Addresses": [ { "Addr": "center-collector.opentelemetry.svc:4317", "ServerName": "", "Attributes": null, "BalancerAttributes": null, "Metadata": null } ], "Attributes": null } ], "ServiceConfig": null, "Attributes": null } {"resource": {}, "grpc_log": true} 2025-06-14T15:31:35.023Z info grpc@v1.72.1/clientconn.go:563 [core] [Channel #1]Channel Connectivity change to CONNECTING{"resource": {}, "grpc_log": true} 2025-06-14T15:31:35.023Z info grpc@v1.72.1/balancer_wrapper.go:195 [core] [Channel #1 SubChannel #2]Subchannel created {"resource": {}, "grpc_log": true} 2025-06-14T15:31:35.023Z info grpc@v1.72.1/clientconn.go:364 [core] [Channel #1]Channel exiting idle mode {"resource": {}, "grpc_log": true} 2025-06-14T15:31:35.023Z info grpc@v1.72.1/clientconn.go:1224 [core] [Channel #1 SubChannel #2]Subchannel Connectivity change to CONNECTING {"resource": {}, "grpc_log": true} 2025-06-14T15:31:35.024Z info grpc@v1.72.1/clientconn.go:1343 [core] [Channel #1 SubChannel #2]Subchannel picks a new address "center-collector.opentelemetry.svc:4317" to connect {"resource": {}, "grpc_log": true} 2025-06-14T15:31:35.024Z info grpc@v1.72.1/server.go:690 [core] [Server #3]Server created {"resource": {}, "grpc_log": true} 2025-06-14T15:31:35.024Z info otlpreceiver@v0.127.0/otlp.go:116 Starting GRPC server {"resource": {}, "otelcol.component.id": "otlp", "otelcol.component.kind": "receiver", "endpoint": "0.0.0.0:4317"} 2025-06-14T15:31:35.025Z info grpc@v1.72.1/server.go:886 [core] [Server #3 ListenSocket #4]ListenSocket created {"resource": {}, "grpc_log": true} 2025-06-14T15:31:35.025Z info otlpreceiver@v0.127.0/otlp.go:173 Starting HTTP server {"resource": {}, "otelcol.component.id": "otlp", "otelcol.component.kind": "receiver", "endpoint": "0.0.0.0:4318"} 2025-06-14T15:31:35.026Z info service@v0.127.0/service.go:289 Everything is ready. Begin running and processing data. {"resource": {}} 2025-06-14T15:31:35.034Z info grpc@v1.72.1/clientconn.go:1224 [core] [Channel #1 SubChannel #2]Subchannel Connectivity change to READY {"resource": {}, "grpc_log": true} 2025-06-14T15:31:35.034Z info pickfirstleaf/pickfirstleaf.go:197 [pick-first-leaf-lb] [pick-first-leaf-lb 0xc000bc6090] SubConn 0xc0008e1db0 reported connectivity state READY and the health listener is disabled. Transitioning SubConn to READY. {"resource": {}, "grpc_log": true} 2025-06-14T15:31:35.034Z info grpc@v1.72.1/clientconn.go:563 [core] [Channel #1]Channel Connectivity change to READY {"resource": {}, "grpc_log": true} root@k8s01:~/helm/opentelemetry# kubectl logs java-demo-5cdd74d47-vmqqx -c otc-container 2025-06-14T15:31:35.013Z info service@v0.127.0/service.go:199 Setting up own telemetry... {"resource": {}} 2025-06-14T15:31:35.014Z debug builders/builders.go:24 Stable component. {"resource": {}, "otelcol.component.id": "otlp 2025-06-14T15:31:35.014Z info builders/builders.go:26 Development component. May change in the future. {"resource": {aces"} 2025-06-14T15:31:35.014Z debug builders/builders.go:24 Beta component. May change in the future. {"resource": {}, "oteles", "otelcol.signal": "traces"} 2025-06-14T15:31:35.014Z debug builders/builders.go:24 Stable component. {"resource": {}, "otelcol.component.id": "otlp 2025-06-14T15:31:35.014Z debug otlpreceiver@v0.127.0/otlp.go:58 created signal-agnostic logger {"resource": {}, "otel 2025-06-14T15:31:35.021Z info service@v0.127.0/service.go:266 Starting otelcol... {"resource": {}, "Version": "0.127.0", 2025-06-14T15:31:35.021Z info extensions/extensions.go:41 Starting extensions... {"resource": {}} 2025-06-14T15:31:35.021Z info grpc@v1.72.1/clientconn.go:176 [core] original dial target is: "center-collector.opentelemetr 2025-06-14T15:31:35.021Z info grpc@v1.72.1/clientconn.go:459 [core] [Channel #1]Channel created {"resource": {}, "grpc 2025-06-14T15:31:35.021Z info grpc@v1.72.1/clientconn.go:207 [core] [Channel #1]parsed dial target is: resolver.Target{URL:ector.opentelemetry.svc:4317", RawPath:"", OmitHost:false, ForceQuery:false, RawQuery:"", Fragment:"", RawFragment:""}} {"resource": { 2025-06-14T15:31:35.021Z info grpc@v1.72.1/clientconn.go:208 [core] [Channel #1]Channel authority set to "center-collector. 2025-06-14T15:31:35.022Z info grpc@v1.72.1/resolver_wrapper.go:210 [core] [Channel #1]Resolver state updated: { "Addresses": [ { "Addr": "center-collector.opentelemetry.svc:4317", "ServerName": "", "Attributes": null, "BalancerAttributes": null, "Metadata": null } ], "Endpoints": [ { "Addresses": [ { "Addr": "center-collector.opentelemetry.svc:4317", "ServerName": "", "Attributes": null, "BalancerAttributes": null, "Metadata": null } ], "Attributes": null } ], "ServiceConfig": null, "Attributes": null } (resolver returned new addresses) {"resource": {}, "grpc_log": true} 2025-06-14T15:31:35.022Z info grpc@v1.72.1/balancer_wrapper.go:122 [core] [Channel #1]Channel switches to new LB policy " 2025-06-14T15:31:35.023Z info gracefulswitch/gracefulswitch.go:194 [pick-first-leaf-lb] [pick-first-leaf-lb 0xc000bc6090] "shuffleAddressList": false }, resolver state { "Addresses": [ { "Addr": "center-collector.opentelemetry.svc:4317", "ServerName": "", "Attributes": null, "BalancerAttributes": null, "Metadata": null } ], "Endpoints": [ { "Addresses": [ { "Addr": "center-collector.opentelemetry.svc:4317", "ServerName": "", "Attributes": null, "BalancerAttributes": null, "Metadata": null } ], "Attributes": null } ], "ServiceConfig": null, "Attributes": null } {"resource": {}, "grpc_log": true} 2025-06-14T15:31:35.023Z info grpc@v1.72.1/clientconn.go:563 [core] [Channel #1]Channel Connectivity change to CONNECTING 2025-06-14T15:31:35.023Z info grpc@v1.72.1/balancer_wrapper.go:195 [core] [Channel #1 SubChannel #2]Subchannel created 2025-06-14T15:31:35.023Z info grpc@v1.72.1/clientconn.go:364 [core] [Channel #1]Channel exiting idle mode {"resource": { 2025-06-14T15:31:35.023Z info grpc@v1.72.1/clientconn.go:1224 [core] [Channel #1 SubChannel #2]Subchannel Connectivity chang 2025-06-14T15:31:35.024Z info grpc@v1.72.1/clientconn.go:1343 [core] [Channel #1 SubChannel #2]Subchannel picks a new addres 2025-06-14T15:31:35.024Z info grpc@v1.72.1/server.go:690 [core] [Server #3]Server created {"resource": {}, "grpc 2025-06-14T15:31:35.024Z info otlpreceiver@v0.127.0/otlp.go:116 Starting GRPC server {"resource": {}, "otelcol.comp 2025-06-14T15:31:35.025Z info grpc@v1.72.1/server.go:886 [core] [Server #3 ListenSocket #4]ListenSocket created {"reso 2025-06-14T15:31:35.025Z info otlpreceiver@v0.127.0/otlp.go:173 Starting HTTP server {"resource": {}, "otelcol.comp 2025-06-14T15:31:35.026Z info service@v0.127.0/service.go:289 Everything is ready. Begin running and processing data. {"reso 2025-06-14T15:31:35.034Z info grpc@v1.72.1/clientconn.go:1224 [core] [Channel #1 SubChannel #2]Subchannel Connectivity chang 2025-06-14T15:31:35.034Z info pickfirstleaf/pickfirstleaf.go:197 [pick-first-leaf-lb] [pick-first-leaf-lb 0xc000bc6090]ansitioning SubConn to READY. {"resource": {}, "grpc_log": true} 2025-06-14T15:31:35.034Z info grpc@v1.72.1/clientconn.go:563 [core] [Channel #1]Channel Connectivity change to READY {"reso #查看collector 日志,已经收到 traces 数据 root@k8s01:~/helm/opentelemetry# kubectl get pod -n opentelemetry NAME READY STATUS RESTARTS AGE center-collector-78f7bbdf45-j798s 1/1 Running 0 3h24m root@k8s01:~/helm/opentelemetry# kubectl get -n opentelemetry pods NAME READY STATUS RESTARTS AGE center-collector-78f7bbdf45-j798s 1/1 Running 0 3h25m root@k8s01:~/helm/opentelemetry# kubectl logs -n opentelemetry center-collector-78f7bbdf45-j798s 2025-06-14T12:09:21.290Z info service@v0.127.0/service.go:199 Setting up own telemetry... {"resource": {}} 2025-06-14T12:09:21.291Z info builders/builders.go:26 Development component. May change in the future. {"resource": {}, "otelcol.component.id": "debug", "otelcol.component.kind": "exporter", "otelcol.signal": "traces"} 2025-06-14T12:09:21.294Z info service@v0.127.0/service.go:266 Starting otelcol... {"resource": {}, "Version": "0.127.0", "NumCPU": 8} 2025-06-14T12:09:21.294Z info extensions/extensions.go:41 Starting extensions... {"resource": {}} 2025-06-14T12:09:21.294Z info otlpreceiver@v0.127.0/otlp.go:116 Starting GRPC server {"resource": {}, "otelcol.component.id": "otlp", "otelcol.component.kind": "receiver", "endpoint": "0.0.0.0:4317"} 2025-06-14T12:09:21.295Z info otlpreceiver@v0.127.0/otlp.go:173 Starting HTTP server {"resource": {}, "otelcol.component.id": "otlp", "otelcol.component.kind": "receiver", "endpoint": "0.0.0.0:4318"} 2025-06-14T12:09:21.295Z info service@v0.127.0/service.go:289 Everything is ready. Begin running and processing data. {"resource": {}} root@k8s01:~/helm/opentelemetry# 2、python应用自动埋点与 java 应用类似,python 应用同样也支持自动埋点, OpenTelemetry 提供了 opentelemetry-instrument CLI 工具,在启动 Python 应用时通过 sitecustomize 或环境变量注入自动 instrumentation。 我们先创建一个java-instrumentation 资源apiVersion: opentelemetry.io/v1alpha1 kind: Instrumentation # 声明资源类型为 Instrumentation(用于语言自动注入) metadata: name: python-instrumentation # Instrumentation 资源的名称(可以被 Deployment 等引用) namespace: opentelemetry spec: propagators: # 指定用于 trace 上下文传播的方式,支持多种格式 - tracecontext # W3C Trace Context(最通用的跨服务追踪格式) - baggage # 传播用户定义的上下文键值对 - b3 # Zipkin 的 B3 header(用于兼容 Zipkin 环境) sampler: # 定义采样策略(决定是否收集 trace) type: always_on # 始终采样所有请求(适合测试或调试环境) python: image: registry.cn-guangzhou.aliyuncs.com/xingcangku/autoinstrumentation-python:latest env: - name: OTEL_PYTHON_LOGGING_AUTO_INSTRUMENTATION_ENABLED # 启用日志的自动检测 value: "true" - name: OTEL_PYTHON_LOG_CORRELATION # 在日志中启用跟踪上下文注入 value: "true" - name: OTEL_EXPORTER_OTLP_ENDPOINT value: http://center-collector.opentelemetry.svc:4318^Croot@k8s01:~/helm/opentelemetry# cat new-python-demo.yaml apiVersion: apps/v1 kind: Deployment metadata: name: python-demo spec: selector: matchLabels: app: python-demo template: metadata: labels: app: python-demo annotations: instrumentation.opentelemetry.io/inject-python: "opentelemetry/python-instrumentation" # 填写 Instrumentation 资源的名称 sidecar.opentelemetry.io/inject: "opentelemetry/sidecar" # 注入一个 sidecar 模式的 OpenTelemetry Collector spec: containers: - name: pyhton-demo image: registry.cn-guangzhou.aliyuncs.com/xingcangku/python-demoapp:latest imagePullPolicy: IfNotPresent resources: limits: memory: "500Mi" cpu: "200m" ports: - containerPort: 5000 oot@k8s03:~# kubectl get pods NAME READY STATUS RESTARTS AGE java-demo-5559f949b9-74p68 2/2 Running 0 2m14s java-demo-5559f949b9-kwgpc 0/2 Terminating 0 14m my-sonarqube-postgresql-0 1/1 Running 8 (2d22h ago) 9d my-sonarqube-sonarqube-0 0/1 Pending 0 6d7h python-demo-599fc7f8d6-lbhnr 2/2 Running 0 20m redis-5ff4857944-v2vz5 1/1 Running 5 (2d22h ago) 6d3h root@k8s03:~# kubectl logs python-demo-599fc7f8d6-lbhnr -c otc-container 2025-06-14T15:57:12.951Z info service@v0.127.0/service.go:199 Setting up own telemetry... {"resource": {}} 2025-06-14T15:57:12.952Z info builders/builders.go:26 Development component. May change in the future. {"resource{}, "otelcol.component.id": "debug", "otelcol.component.kind": "exporter", "otelcol.signal": "traces"} 2025-06-14T15:57:12.952Z debug builders/builders.go:24 Stable component. {"resource": {}, "otelcol.component.id": "p", "otelcol.component.kind": "exporter", "otelcol.signal": "traces"} 2025-06-14T15:57:12.952Z debug builders/builders.go:24 Beta component. May change in the future. {"resource": {}, "lcol.component.id": "batch", "otelcol.component.kind": "processor", "otelcol.pipeline.id": "traces", "otelcol.signal": "traces"} 2025-06-14T15:57:12.952Z debug builders/builders.go:24 Stable component. {"resource": {}, "otelcol.component.id": "p", "otelcol.component.kind": "receiver", "otelcol.signal": "traces"} 2025-06-14T15:57:12.952Z debug otlpreceiver@v0.127.0/otlp.go:58 created signal-agnostic logger {"resource": {}, "lcol.component.id": "otlp", "otelcol.component.kind": "receiver"} 2025-06-14T15:57:12.953Z info service@v0.127.0/service.go:266 Starting otelcol... {"resource": {}, "Version": "0.127, "NumCPU": 8} 2025-06-14T15:57:12.953Z info extensions/extensions.go:41 Starting extensions... {"resource": {}} 2025-06-14T15:57:12.953Z info grpc@v1.72.1/clientconn.go:176 [core] original dial target is: "center-collector.opentelery.svc:4317" {"resource": {}, "grpc_log": true} 2025-06-14T15:57:12.954Z info grpc@v1.72.1/clientconn.go:459 [core] [Channel #1]Channel created {"resource": {}, "c_log": true} 2025-06-14T15:57:12.954Z info grpc@v1.72.1/clientconn.go:207 [core] [Channel #1]parsed dial target is: resolver.Target{:url.URL{Scheme:"passthrough", Opaque:"", User:(*url.Userinfo)(nil), Host:"", Path:"/center-collector.opentelemetry.svc:4317", Rawh:"", OmitHost:false, ForceQuery:false, RawQuery:"", Fragment:"", RawFragment:""}} {"resource": {}, "grpc_log": true} 2025-06-14T15:57:12.954Z info grpc@v1.72.1/clientconn.go:208 [core] [Channel #1]Channel authority set to "center-collec.opentelemetry.svc:4317" {"resource": {}, "grpc_log": true} 2025-06-14T15:57:12.954Z info grpc@v1.72.1/resolver_wrapper.go:210 [core] [Channel #1]Resolver state updated: { "Addresses": [ { "Addr": "center-collector.opentelemetry.svc:4317", "ServerName": "", "Attributes": null, "BalancerAttributes": null, "Metadata": null } ], "Endpoints": [ { "Addresses": [ { "Addr": "center-collector.opentelemetry.svc:4317", "ServerName": "", "Attributes": null, "BalancerAttributes": null, "Metadata": null } ], "Attributes": null } ], "ServiceConfig": null, "Attributes": null } (resolver returned new addresses) {"resource": {}, "grpc_log": true} 2025-06-14T15:57:12.954Z info grpc@v1.72.1/balancer_wrapper.go:122 [core] [Channel #1]Channel switches to new LB poli"pick_first" {"resource": {}, "grpc_log": true} 2025-06-14T15:57:12.954Z info gracefulswitch/gracefulswitch.go:194 [pick-first-leaf-lb] [pick-first-leaf-lb 0xc00046e] Received new config { "shuffleAddressList": false }, resolver state { "Addresses": [ { "Addr": "center-collector.opentelemetry.svc:4317", "ServerName": "", "Attributes": null, "BalancerAttributes": null, "Metadata": null } ], "Endpoints": [ { "Addresses": [ { "Addr": "center-collector.opentelemetry.svc:4317", "ServerName": "", "Attributes": null, "BalancerAttributes": null, "Metadata": null } ], "Attributes": null } ], "ServiceConfig": null, "Attributes": null } {"resource": {}, "grpc_log": true} 2025-06-14T15:57:12.954Z info grpc@v1.72.1/clientconn.go:563 [core] [Channel #1]Channel Connectivity change to CONNECTI"resource": {}, "grpc_log": true} 2025-06-14T15:57:12.954Z info grpc@v1.72.1/balancer_wrapper.go:195 [core] [Channel #1 SubChannel #2]Subchannel create"resource": {}, "grpc_log": true} 2025-06-14T15:57:12.954Z info grpc@v1.72.1/clientconn.go:364 [core] [Channel #1]Channel exiting idle mode {"resource{}, "grpc_log": true} 2025-06-14T15:57:12.954Z info grpc@v1.72.1/clientconn.go:1224 [core] [Channel #1 SubChannel #2]Subchannel Connectivity cge to CONNECTING {"resource": {}, "grpc_log": true} 2025-06-14T15:57:12.954Z info grpc@v1.72.1/clientconn.go:1343 [core] [Channel #1 SubChannel #2]Subchannel picks a new adss "center-collector.opentelemetry.svc:4317" to connect {"resource": {}, "grpc_log": true} 2025-06-14T15:57:12.954Z info grpc@v1.72.1/server.go:690 [core] [Server #3]Server created {"resource": {}, "c_log": true} 2025-06-14T15:57:12.954Z info otlpreceiver@v0.127.0/otlp.go:116 Starting GRPC server {"resource": {}, "otelcol.ponent.id": "otlp", "otelcol.component.kind": "receiver", "endpoint": "0.0.0.0:4317"} 2025-06-14T15:57:12.954Z info otlpreceiver@v0.127.0/otlp.go:173 Starting HTTP server {"resource": {}, "otelcol.ponent.id": "otlp", "otelcol.component.kind": "receiver", "endpoint": "0.0.0.0:4318"} 2025-06-14T15:57:12.954Z info service@v0.127.0/service.go:289 Everything is ready. Begin running and processing data. {"ource": {}} 2025-06-14T15:57:12.955Z info grpc@v1.72.1/server.go:886 [core] [Server #3 ListenSocket #4]ListenSocket created {"ource": {}, "grpc_log": true} 2025-06-14T15:57:12.962Z info grpc@v1.72.1/clientconn.go:1224 [core] [Channel #1 SubChannel #2]Subchannel Connectivity cge to READY {"resource": {}, "grpc_log": true} 2025-06-14T15:57:12.962Z info pickfirstleaf/pickfirstleaf.go:197 [pick-first-leaf-lb] [pick-first-leaf-lb 0xc00046e] SubConn 0xc0005fccd0 reported connectivity state READY and the health listener is disabled. Transitioning SubConn to READY. {"ource": {}, "grpc_log": true} 2025-06-14T15:57:12.962Z info grpc@v1.72.1/clientconn.go:563 [core] [Channel #1]Channel Connectivity change to READY {"ource": {}, "grpc_log": true} root@k8s03:~# root@k8s03:~# kubectl logs -n opentelemetry center-collector-78f7bbdf45-j798s 2025-06-14T12:09:21.290Z info service@v0.127.0/service.go:199 Setting up own telemetry... {"resource": {}} 2025-06-14T12:09:21.291Z info builders/builders.go:26 Development component. May change in the future. {"resourceaces"} 2025-06-14T12:09:21.294Z info service@v0.127.0/service.go:266 Starting otelcol... {"resource": {}, "Version": "0.127 2025-06-14T12:09:21.294Z info extensions/extensions.go:41 Starting extensions... {"resource": {}} 2025-06-14T12:09:21.294Z info otlpreceiver@v0.127.0/otlp.go:116 Starting GRPC server {"resource": {}, "otelcol. 2025-06-14T12:09:21.295Z info otlpreceiver@v0.127.0/otlp.go:173 Starting HTTP server {"resource": {}, "otelcol. 2025-06-14T12:09:21.295Z info service@v0.127.0/service.go:289 Everything is ready. Begin running and processing data. {" 2025-06-14T16:05:11.811Z info Traces {"resource": {}, "otelcol.component.id": "debug", "otelcol.component.kind": "expor 2025-06-14T16:05:16.636Z info Traces {"resource": {}, "otelcol.component.id": "debug", "otelcol.component.kind": "expor 2025-06-14T16:05:26.894Z info Traces {"resource": {}, "otelcol.component.id": "debug", "otelcol.component.kind": "expor 2025-06-14T16:18:11.294Z info Traces {"resource": {}, "otelcol.component.id": "debug", "otelcol.component.kind": "expor 2025-06-14T16:18:21.350Z info Traces {"resource": {}, "otelcol.component.id": "debug", "otelcol.component.kind": "expor root@k8s03:~#